Automating my home with MQTT
How I automated and connected sensors with MQTT! Featuring sunrise alarms, 3D printers, and sensor nodes!

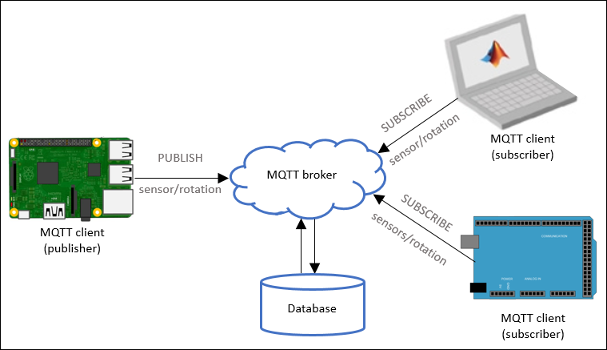
How I automated my home with MQTT.
This started when I decided to implement an Network Attached Storage to use a hard drive that I had lying around as a DIY solution to Dropbox's capping of devices. My project worked perfectly, but it seemed like such a waste leaving a Raspberry Pi 3B+ running constantly to manage an NAS that I don't use all that often.
So I decided to start on a project to automate and collect data around my room. Besides, I have an embarrassment of Raspberry Pis' that are just waiting to put into service.
3D printer
The first thing I did was to dig out the oldest Raspberry Pi and press it into service as an OctoPi server for my Anet A8 3D printer.
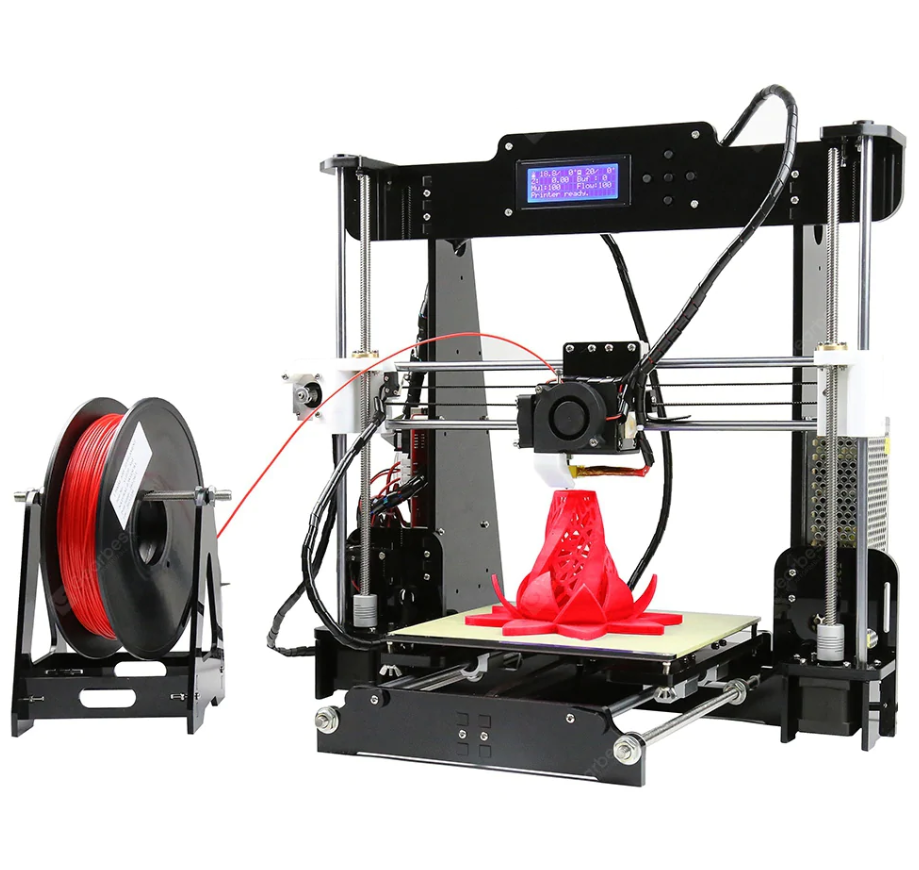
I bought this 3D printer a few years ago with the aim of being able to quickly prototype designs at home. I have to say that this is not a printer you want to use if you have no patience with tinkering. However, it does have the low price of $160 going for it.
I use it for quick prints because the quality can be a little rough, but I found shuttling a SD card to and from my desk rather tiring. I used an old Raspberry Pi B with a TP Link 722N WiFi adaptor attached to serve as my end node on my MQTT network.
I ran into an issue connecting to the network, and then I realised that because the network was a 5G network and the adaptor was only capable up to 2.4G (note: not everything is 5G enabled!). Switching over to a 2.4G network made it work instantly. I added an MQTT plugin for the OctoPi so that I can monitor it remotely on my central 3B+.
Lighting
Next, I wanted to control the lighting in my room automatically. I bought a Light strip controller from AliExpress.

A lot of WiFi enabled devices these days are powered by an ESP8266. This is great because a common chip means that there is a lot of shared firmware and the development of an ecosystem. For the ESP8266 smart devices, this would be Tasmota. I flashed the excellent Tasmota firmware for these controllers the moment they came in the mail. It wasn't too hard. All you had to do was to pry open the case and solder some temporary wires to the test pads on the PCB, which are already very kindly labelled for you. There are even instructional YouTube videos. The Tasmota firmware allows for easy setup of these WiFi devices with your phone by turning these devices into temporary Access Points, allowing you to connect to the network to configure each device. It also enables MQTT on these devices, allowing easy control from a central server.
Each RGB channel can be controlled independently, and since they share a common cathode, I soldered the + ends of the warm and cool white lights together and soldered the - ends to G and R. Now, by sending a specific RGB color value to the light controller, I can control the mix and intensity of white/warm lights.
From the Raspberry Pi 3B+ I can then run a python script that publishes to the channel that the controller is listening on to turn on and off the lights. The control can be a timer, a physical knob, or even a button on a phone. In some ways, this is quite flexible and an upgrade to my Sunrise Alarm Project, because the parts can be bought off the shelf and timing is controlled via a relatively precise clock on the Raspberry Pi. Furthermore, configuring it is just a matter of updating a python script instead of reprogramming the entire device. I am using the schedule and the paho-mqtt library for this script. The following is the line I am using to publish new lighting commands to the channel:
publish.single("cmnd/sonoff/color", "#"+format(ww,'02x')+format(cw,'02x')+"00", hostname=MQTT_SERVER)Currently the light is controlled via a Python script that lights up the strip slowly at a given time every day. Future work would include being able to control it directly. After some testing, I think while it is not bright enough to wake me up immediately, it certainly beats having to groggily claw my way up from bed in darkness.
Server
For storing data, I used the SQLite database because it is lightweight and suited for my application. It is used to log data from the sensor node/s for later study.
Sensor Node
I wanted some sensors to tell me the conditions of my room. The easiest and fastest way to do that is the build a node with an ESP8266 so that it can connect to the network and the MQTT broker.
Since I wanted a light and temperature sensor, I opted to use the WEMOS form factor. This is a convenient form factor as it is small and has many shields available to it. I used the I2C shield in parallel with an RGB shield. The temperature sensor was an SHT30 I2C digital temperature sensor, and a BH1750 ambient light sensor. This is about $10 in total from AliExpress and it took me an hour to assemble and connect it to my MQTT network. I am using the pubsubclient library for MQTT in Arduino. I also noticed that the library does not accept a hostname but rather needs a fixed IP address. This might be an issue later down the road because the IP address of the Raspberry Pi is not fixed.
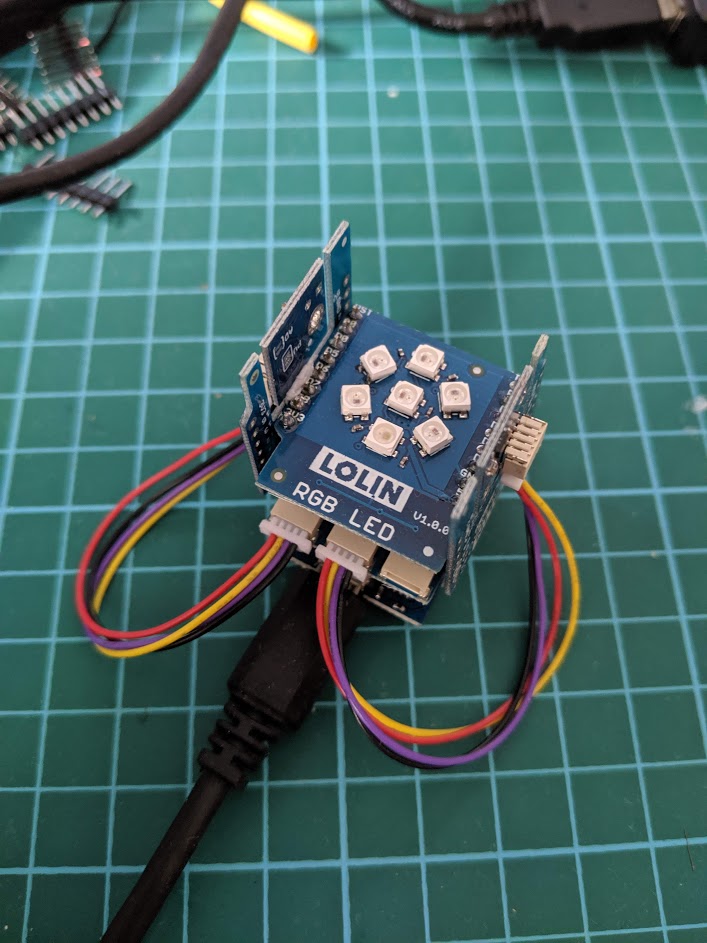
The result is a small but powerful sensor node. While building an equivalent board would have given a smaller footprint, but it would have been more expensive and taken significantly longer to design and assemble, especially if we are talking about SMD assembly. Each of these nodes can also be quickly replicated by soldering 0.1in headers. I found that adding the RGB LEDs were a nice touch because I could visually follow the boot process without having to open a terminal or plug in a computer.
Fixing an issue with Last Will
Last will messages are set when your client first connects to the broker and is issued by the broker when it detects that your client has disconnected. This can be useful in tracking the status of which clients are online, especially if they disconnect without sending a disconnect message.
I ran into an issue where my last will message was always publishing even though my client was still connected. I traced this issue back to how I used the pubsubclient library on Arduino. In the example sketch, it chooses a random client ID for your implementation. However, because I was publishing to the same topic, and Mosquitto tracks if your client is on using the client ID, my client is never online because Mosquitto is tracking a old random client ID.
Therefore my solution was to pick a fixed client ID and a new channel to keep track of the status of my client.