The Drawdio

I got started by Googling how to get started with Arduino and came across a description of the Drawdio in the post. I followed the link to the Maker website and began my project.
Description
It was easy to get started on this project because there was a electronics lab that I could access. They had the resistors and capacitors that I needed and I found a board in the lab that I could use to solder everything on. There was a RadioShack nearby so it was easy to obtain all my other components.
If I did not have access to such a bench my second best bet would be to find the closest place that sells electronic components and gather up what I needed. Arrow offers free shipping for students with 20% off, which is an absolutely amazing deal if you are just starting out, as you would most likely be buying small quantities of components. A good idea would be to grab some extra as you can use these same components later without having the incur shipping fees.
If you don't have access to such a place, you could also set up a workbench, which is detailed in my Getting Started post. I think this would be the best option in the long run because having an electronics bench nearby helps greatly with project possibilities and simply just doing it rather than thinking about it.
Note that in this project, I used a 500uF capacitor instead of a 560uF capacitor, a AAA setup for size (actually I bought the wrong battery holder) and everything still worked.
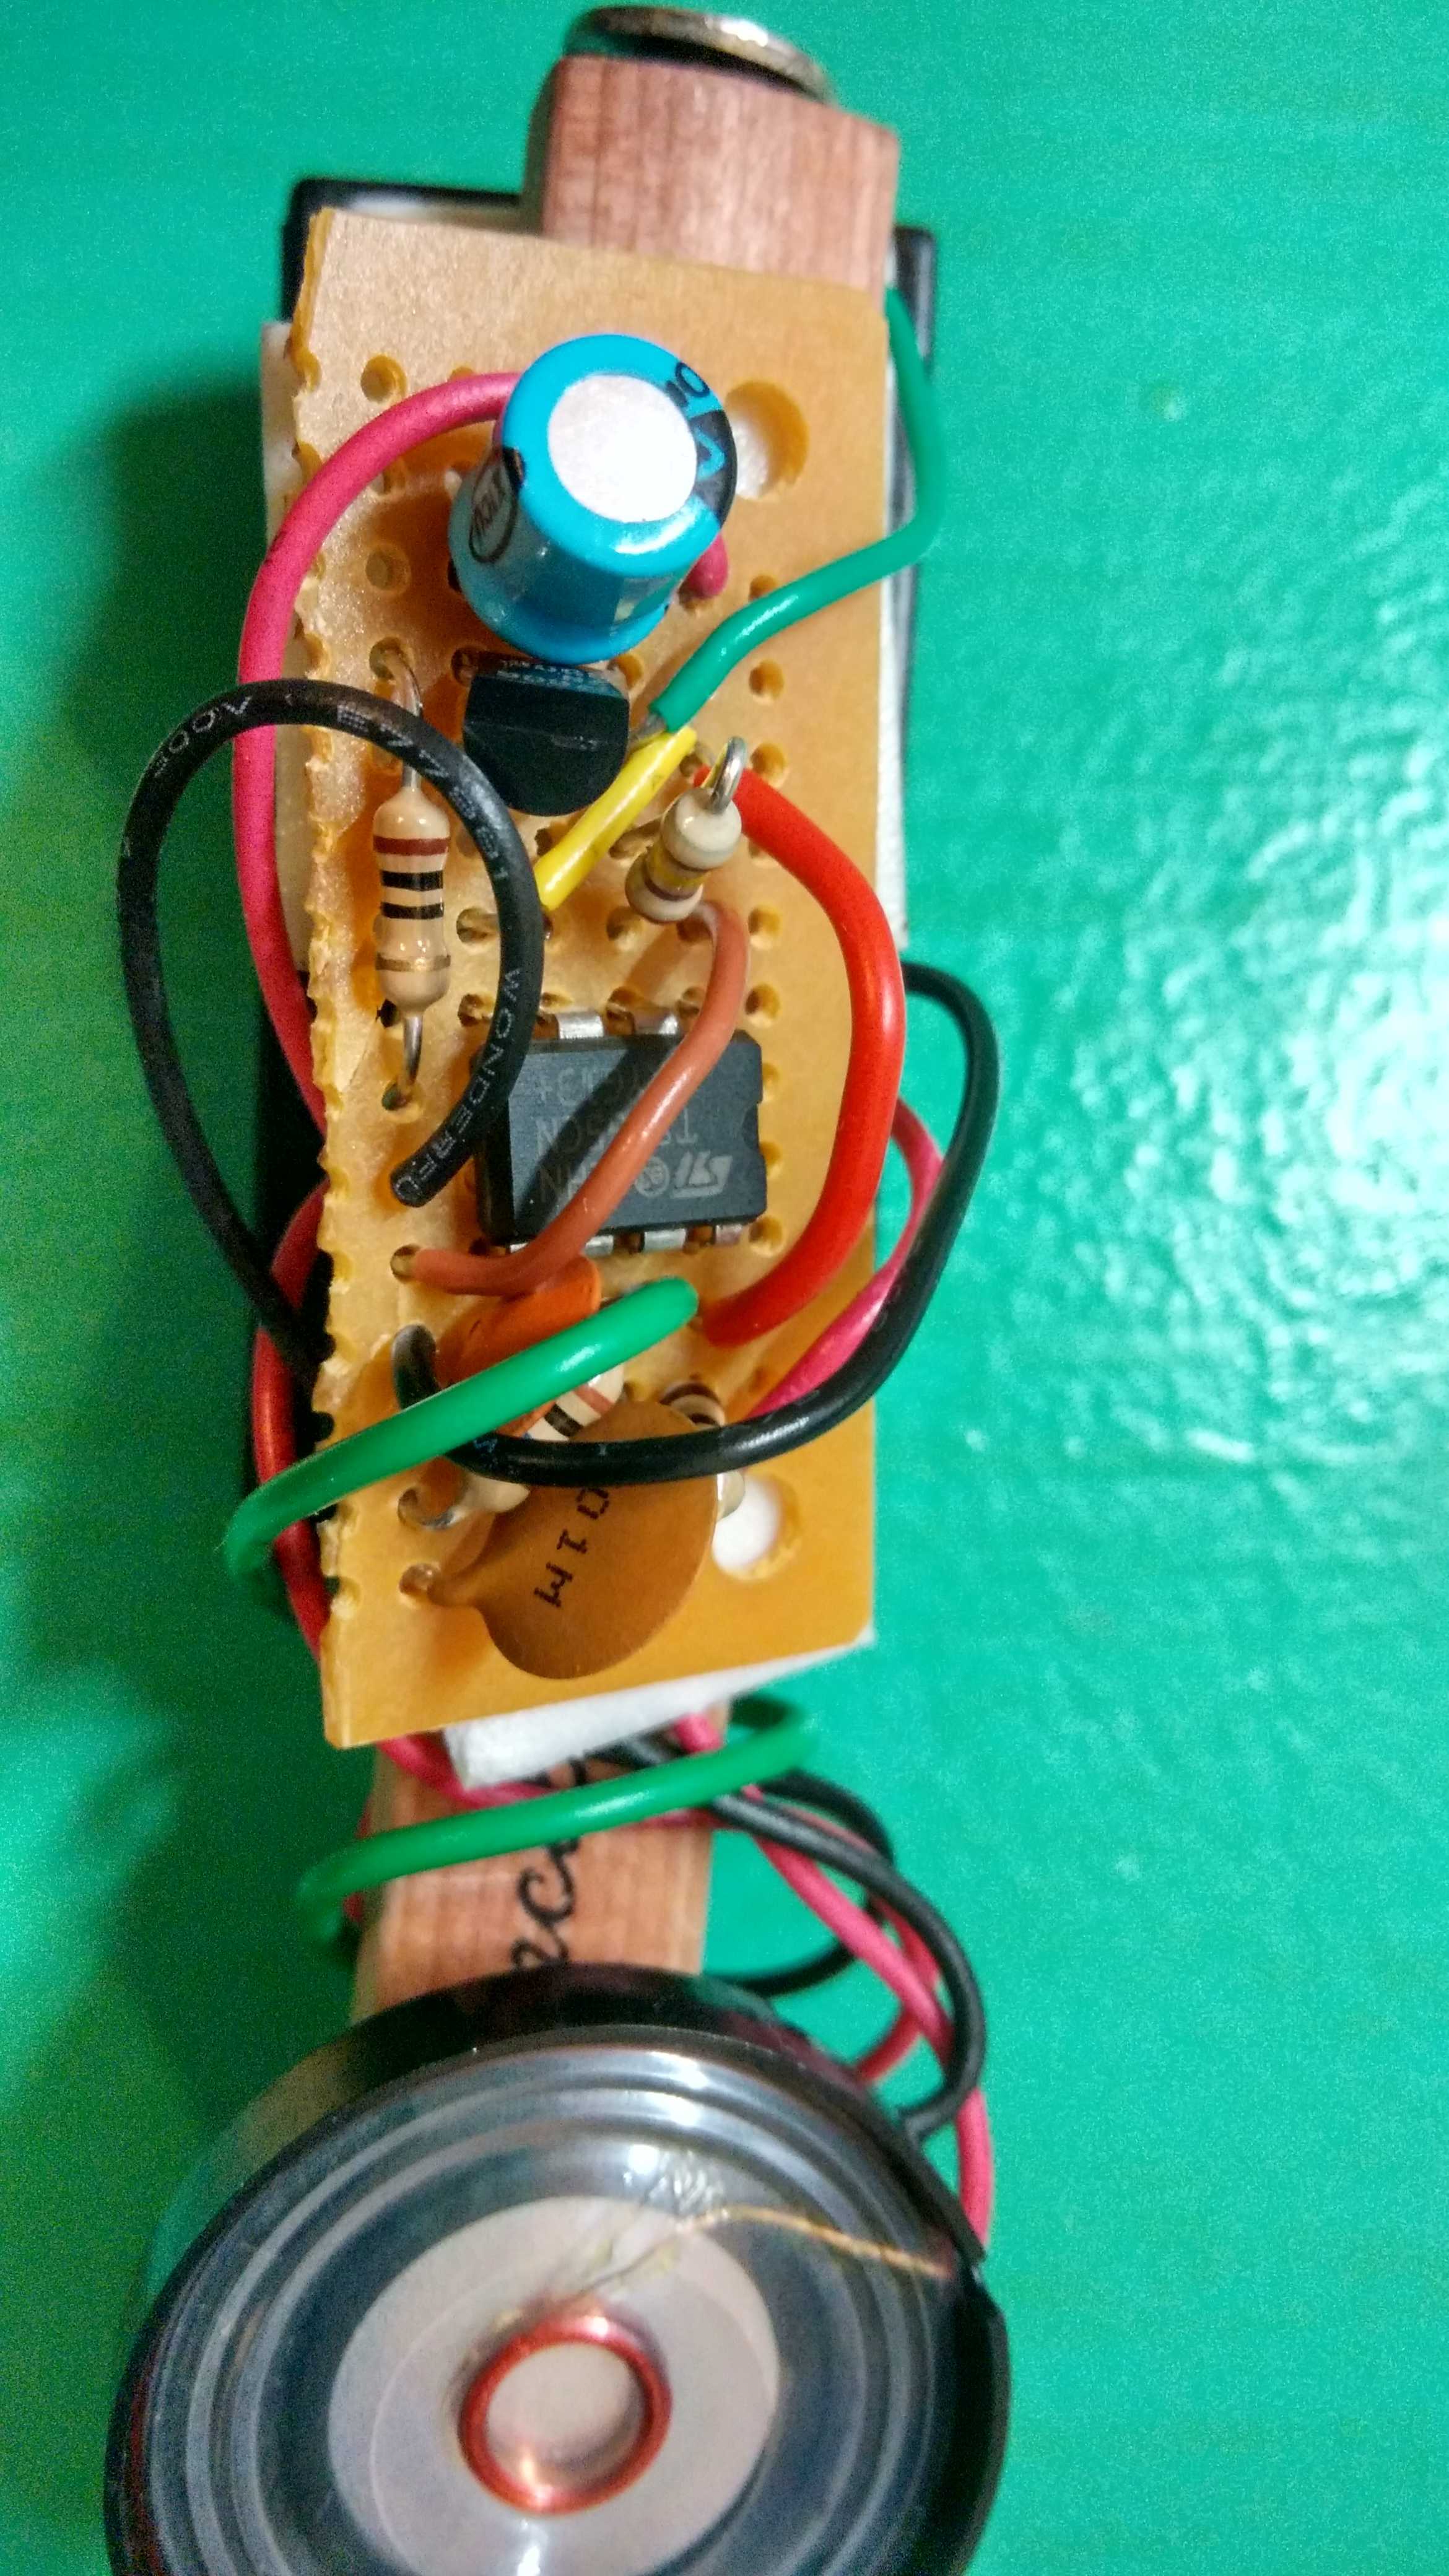 Figure 1. Close up of Drawdio
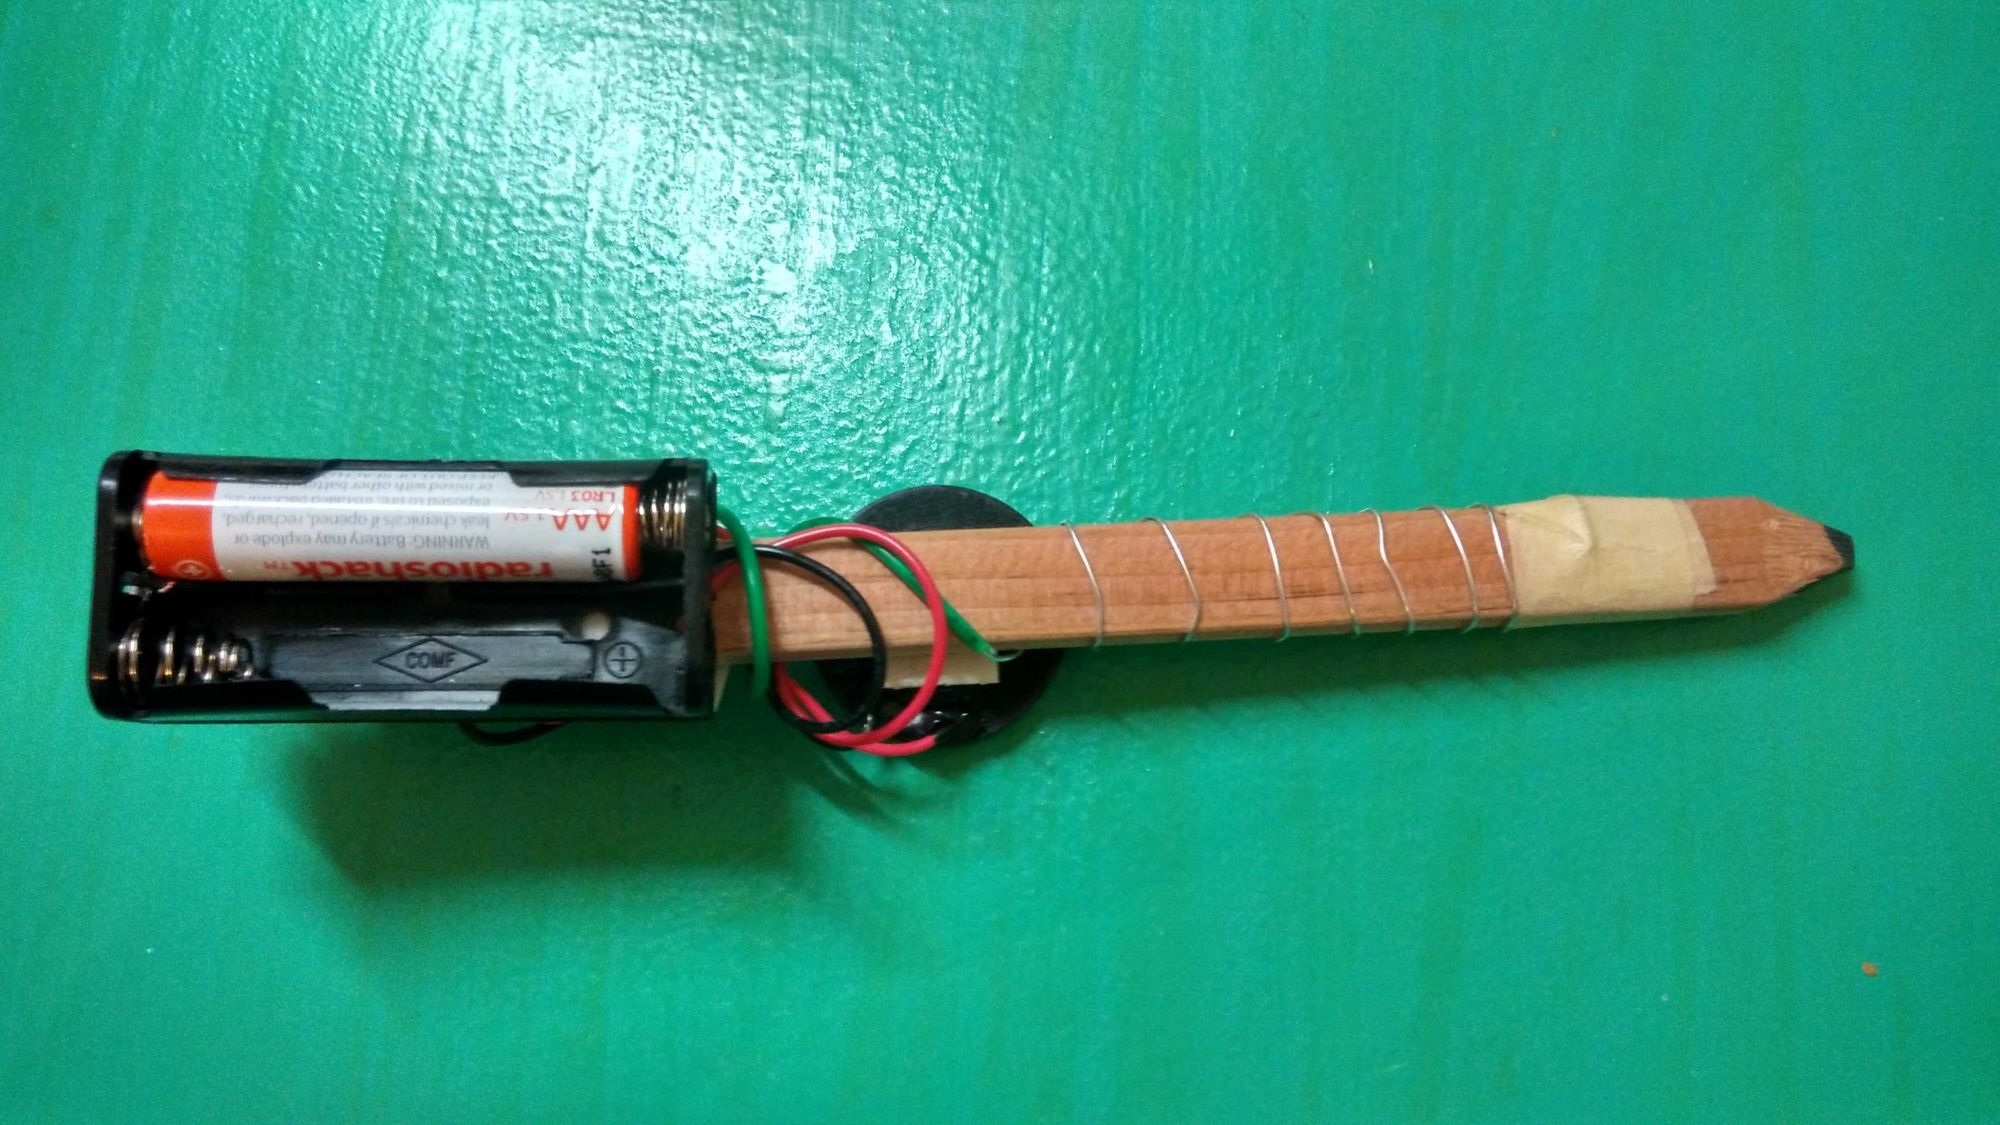
 Figure 2. Final Product
Some tips:
- Know that solder goes on the other side of the heat. This allows the solder to flow towards the heat, making a good joint.
- Learn to desolder first. It helped me quite a bit when I over-soldered some joints. As this configuration is quite packed (for a first project), knowing how to desolder was very useful for me.