Artificial Assistant

Ever wanted a artificial assistant that you control? Well now you can! With all the api's floating around, it is extremely simple to build a Siri-like/Alexa device that you can completely program and control in Python. This also avoids the somewhat uncomfortable idea that a company has a listening device in your room.
Update 3: The Python Telegram Bot API has been fixed and the dropout no longer exists.
Update 2: It appears that this process is growing on its own. I am on my fifth day of working on my digital assistant and there is always something new and exciting you can add. Visualisation, data, music, weather.
Update 1: Pressing a button wasn't as satisfying, so I decided that talking to the bot would make for more entertainment. I tried out a few platforms and I currently have decided that Telegram was the best platform for me.
However using the Python Telegram Bot api has been challenging because it cuts out the connection every thirty minutes and stops responding. Unfortunately while I have raised it as an issue, it is something that they have not fixed yet, and I have been unable to find another messaging app that provides a voice functionality.
Following the success of my morning light prototype, I decided I wanted something more. I wanted to see if I could have things at a button's touch away.
Item List
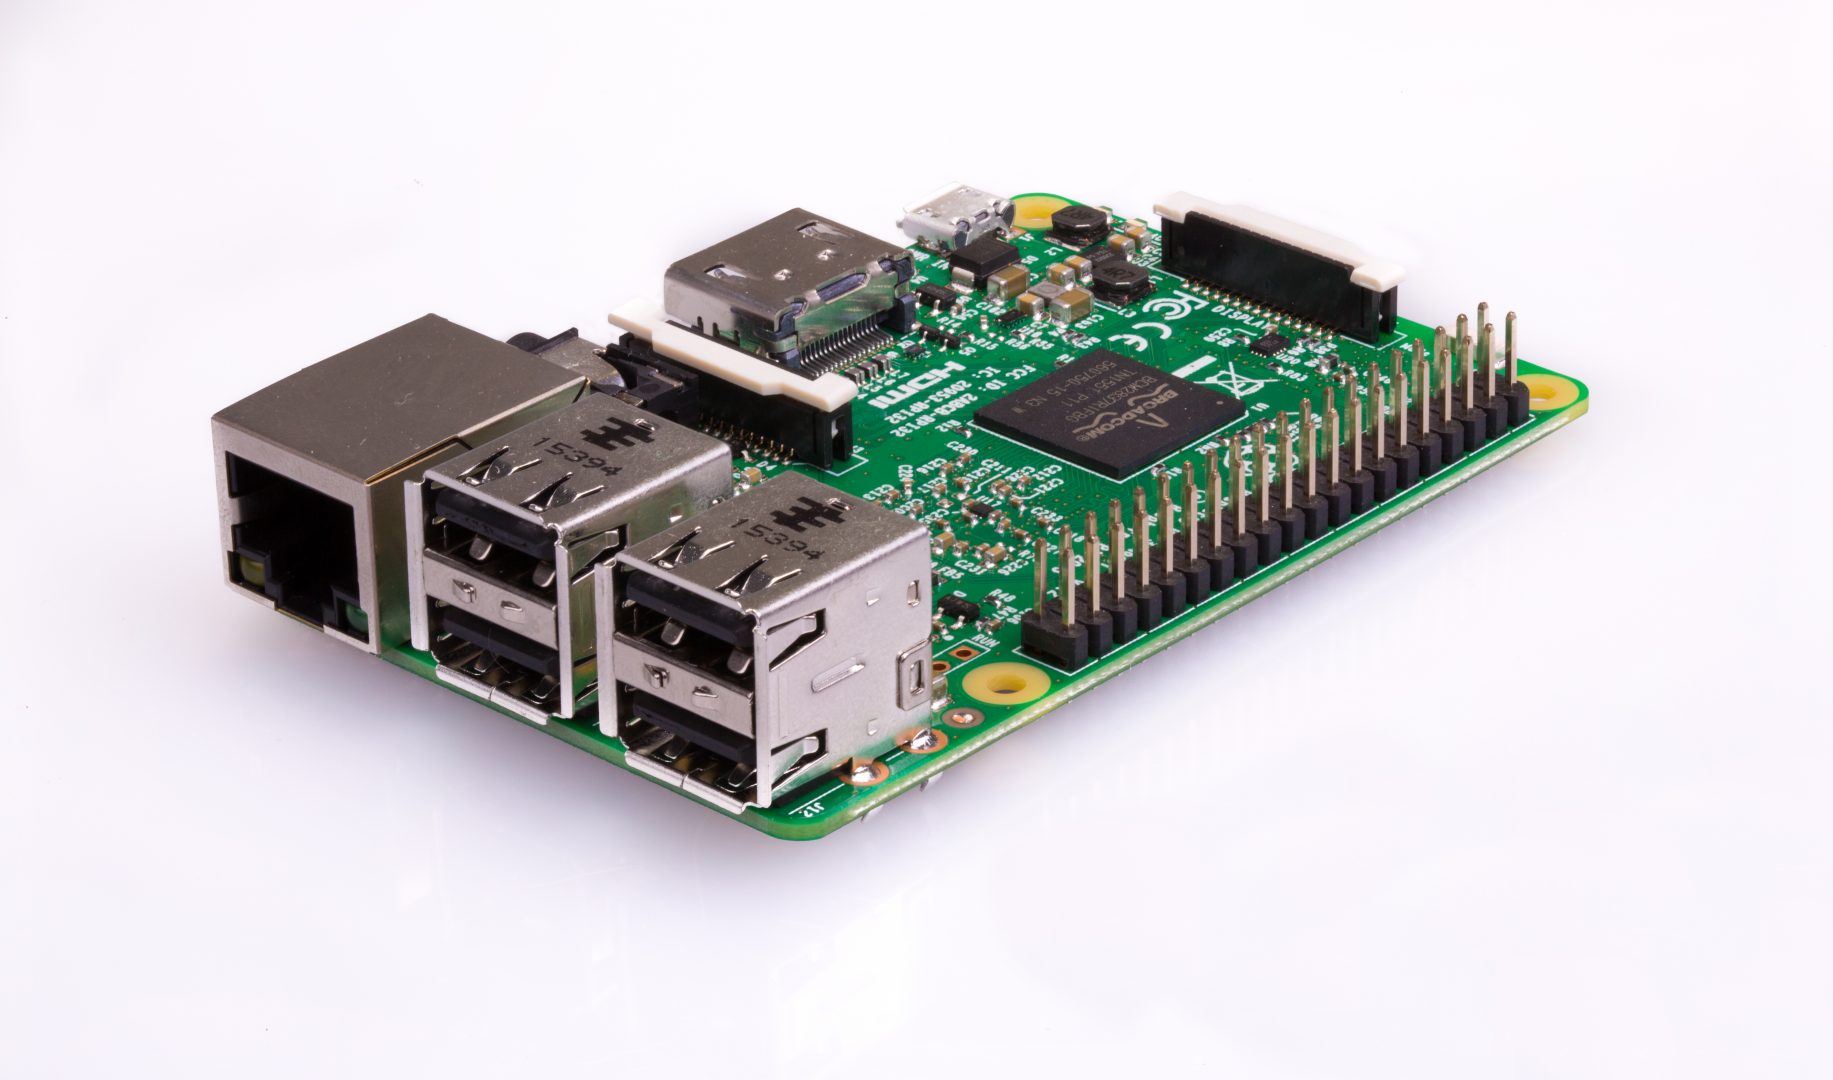
- Raspberry Pi 3 or computer as server
- IoT Button (Amazon Dash or ESP8266)
- ESP8266 (WeMos Mini)
- 9g SG90 Micro Servo
- Raspberry Pi Camera V2 or USB webcam
Building the Server
I had a Raspberry Pi 3 from Arrow's giveaway, so I wanted to use it to build something cool.
So why not use it as an Access Point? That sounded pretty cool, and because the Pi has onboard wifi, that means that you don't need anything else other than the Pi itself to start building. I followed this tutorial from Phil Martin to setup my Pi as a access point.
The IoT button
I also had a couple of Amazon dash buttons that I had picked up for a dollar each when they went on sale with the intent of using them as IoT buttons. I poked around online and found this excellent tutorial by David Sikes on how to use Python 3 on a listening device (my Pi!) to sniff for Amazon packets.
I stripped out most of the code because I didn't need it:
import logging
logging.getLogger("scapy.runtime").setLevel(logging.ERROR)
from scapy.all import * # for sniffing for the ARP packets

print('Init done.')

def arp_display(pkt):
  if pkt[ARP].op == 1: #who-has (request)
    if pkt[ARP].psrc == '0.0.0.0':
        if pkt[ARP].hwsrc == '74:75:48:a5:33:be':

            print("Pushed Black Button 1")

        elif pkt[ARP].hwsrc == '10:ae:60:64:04:95':
            print("Pushed Black Button 2")
        else:
            print("ARP Probe from unknown device: " + pkt[ARP].hwsrc)

print(sniff(prn=arp_display, filter="arp", store=0))
I replaced the hardware address of the buttons with my own. I tested with my own button to check that it works before moving on.
Wake Computer from Shutdown
So now we've got a device that can react once we press a button. I decided to have it send a Wake-On-Lan packet to my computer, which is convenient because the power button is hard to reach. I tried to get scapy to send a magic packet, but I found a far more convenient solution in Mike Pennington's code on github. I moved the wol.py folder to the same folder and modified the script as follows:
import wol
import logging
logging.getLogger("scapy.runtime").setLevel(logging.ERROR)
from scapy.all import * # for sniffing for the ARP packets

obj = wol.WOL("00:30:1b:b0:f7:7d", intf="eth0")

print('Init done.')

def arp_display(pkt):
  if pkt[ARP].op == 1: #who-has (request)
    if pkt[ARP].psrc == '0.0.0.0':
        if pkt[ARP].hwsrc == '74:75:48:a5:33:be':

            obj.raw()
            obj.udp4()
            obj.udp6()

        else:
            print("ARP Probe from unknown device: " + pkt[ARP].hwsrc)

print(sniff(prn=arp_display, filter="arp", store=0))
With luck your PC should turn on at a touch of a button that is not on the PC.
But this has the potential to go so much further. My love of the ESP8266 module has been well documented, and I thought it was perfectly suitable for this project. Switching on the lights in the morning can be a cold task, so while you struggle against your sheets, why not have the button turn the lights on for you and boot your computer and make your coffee...
Turning on the lights
But since I didn't want to mess with high voltage power supply, we'll have to use a stand-in for our finger, specifically have something flick the switch physically. The best way to do it is with a servo motor.
There are several implementations on how to do this. If you have a rocker switch, it is terribly simple: Stick it against the wall and adjust the angle until everything is great.

Figure 1. Rocker Light Switch
The instructable can be found here: http://www.instructables.com/id/Automatic-Light-Switch-2/
But if you've got a pointy-type switch, then it is more of a problem. It is not easy for a servo to flick the end of the switch. You could pull it, as some people people have done:
- http://www.instructables.com/id/Automated-light-switch/
- http://www.instructables.com/id/Redirecting-a-Light-Switch/
Or you could build a custom designed case as bjkayani has done here:

Figure 2. Wifi Enabled Switch
While I like the design, I wasn't willing to incorporate the entire thing because there was stuff that I didn't really need.
However, I was pretty excited when I took a closer look at his design:

Figure 3. Inside of Switchifi
It uses a piece of 3D printed plastic to push and pull the switch. The switch and the servo fit into their own slots and there isn't a need to deal with slack lines. The required torque of the servo is also smaller in this case because the application of force can be closer to the servo axis as compared to using the arm of the servo to flick the switch.
The problem is that this design uses guide rails. That would not be easy to just strip out and use in another project.
Fortunately after some experimentation, I discovered that I didn't need guide rails. I used a piece of cardboard and cut it so that it had the shape I wanted. I made the holes small so that the servo's arm and the switch would fit snugly in and it was a small matter to calibrate the angles required for a comfortable rest on/off position for the servo so that it doesn't click.
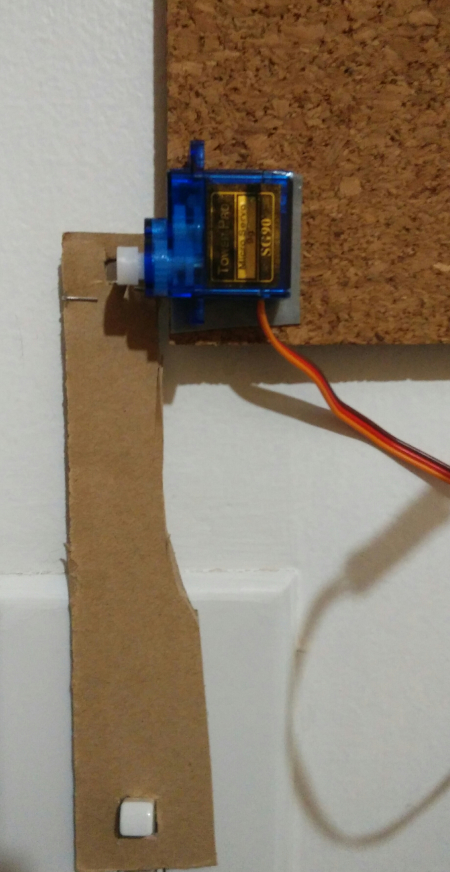
Figure 4. Prototype solution 1
Putting it together
Now to hook it up to our wonderful Pi. I didn't want to use an external service like the IFTTT channel because I didn't see the need to. All that is required is a single byte to be sent to turn the switch on or off.
So this tutorial by James Lewis really helped me put the final part of this project together. A quick note that the host I was using was the localhost because I integrated MQTT into the python script, but on the Arduino side, I used the ip address of the Pi server as the host. I added the example for the esp(Servo) into the Arduino code and everything came together.
Building a Bot
Building a bot to control the room would be more entertaining, even if it wasn't efficient from a practical point of view. I use Telegram because it is very easy to build a bot on Telegram with python.
I used the Python-Telegram-Bot library as my platform. First you'll have to request for a bot from Telegram's BotFather. Using the API key, you can then start creating your own bot.
I used Python 2.7 for the scripting because it simply works. Many code examples and libraries (especially some of the older ones) are written for Python 2.7 and it is a headache to translate them to Python 3. However, Python 3 code works in Python 2.7 with only a few tweaks. Hence, it is simply easier to use Python 2.7 at this point. Zed Shaw has made a case against using Python 3 which echoes a lot of my issues before I just ran python instead of python3 to get things to work.
Lights
The most basic interaction that I wanted the bot to have is to control the lights. The implementation is almost identical to the button. Post a 1 to our topic from the script upon receiving a message like "Lights". This will trigger the ESP8266 which is listening on the same topic to flick the switch.
I made a few changes to the code that has the ESP8266 posting the position of the switch after it completes it's flicking. This is on another channel that retains the message so that when we subscribe to it, we will know the last position of the switch and make decisions.
Weather
I always check the weather before I go out, so I think it would be useful for my bot to be able to report the weather when I ask it to.
I used the Open Weather Map API with the pyowm library to allow my Bot to report the weather. The benefit of using the pyowm library is that I save time having to retrieve and parse the JSON code. Plus it makes the code neater as well.
Music
Instead of using pianobar, I decided to store my own music locally and use vlc's python interface to play music.
I previously used the pianobar application to play music from Pandora and I used Adafruit's instructions to build the application.
I then used the python wrapper to talk to pianobar through my python script. By issuing commands to my Bot, I can also control the music.
Some notes are that pianobar is kind of spotty where it would play three or four tracks before stopping. I'm not sure what is going on, although I have searched extensively for a solution.
Web-facing Dashboard
A dashboard is pretty useful way to determine the state of the system without needing to query the system. I wanted something like the magic mirror project to display all the information I wanted:

But due to complexity issues (did not know how to integrate Electron painlessly) I settled on using Flask as my web app. It took awhile for me to get it working, mainly because I didn't know that I had to use two separate threads to keep the webserver and the bot running, but once it is up, adding items is as simple as editing the html.
I have also not bought a glass front for my project because it is extremely expensive, and I'm not quite done with adding what I want to this project yet.
Camera
Having a camera to verify the status of the room (and perform facial recognition) is pretty cool. So I added a Raspberry Pi camera (you can also use a USB camera) and simply used the python library to take pictures. This was the simplest part of the project. I merely had to write three additional lines to allow picture-taking capabilities.
Conclusion
So this button can be placed anywhere, and it does two things: it turns on the computer and switches the light on or off depending on the last state. The total number of tutorials consulted was 5. Sometimes there aren't any solutions to the problems you are facing, and you learn something new. But sometimes when there are, you can build something really fun in a day and you learn something new too.
I can also talk to my Bot, and ask it about the weather, the condition of the room, the songs it is playing.. etc. The best thing about a bot is that you only really need to work on the messaging side of the bot. Everything else can be carried over to another platform if necessary. I tried Slack and Telegram, and it worked after working out how the messaging API worked for both platforms.
I didn't post my code because I'm still working on it and it is really straightforward to just grab the code from the places I referenced and make a few tweaks (as in copy-paste, delete unused lines).
Improvements
- Bus times
- Weather display
- Facial Recognition
- Independent turn-on switch from computer.
- PIR sensor to take a picture when someone enters the room.