Model Rocketry


What is it?
Model rocketry is a sport where you launch rockets that you built into the sky, sometimes kilometers high, and retrieve all components, hopefully intact.
Why is this cool?
Model Rocketry combines mechanical and electrical components and puts them into a the same chamber as a controlled explosion.
Introduction
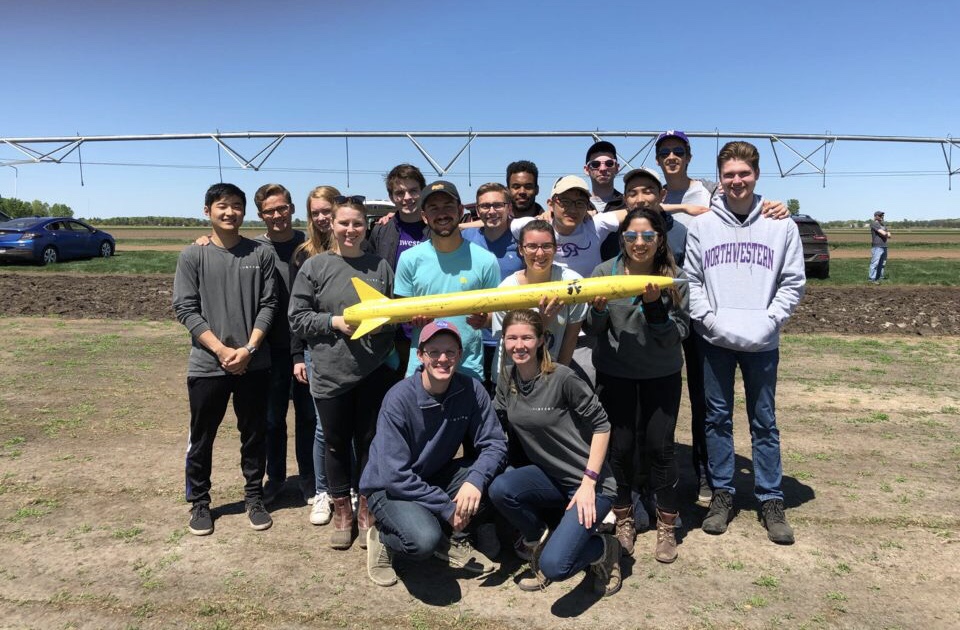
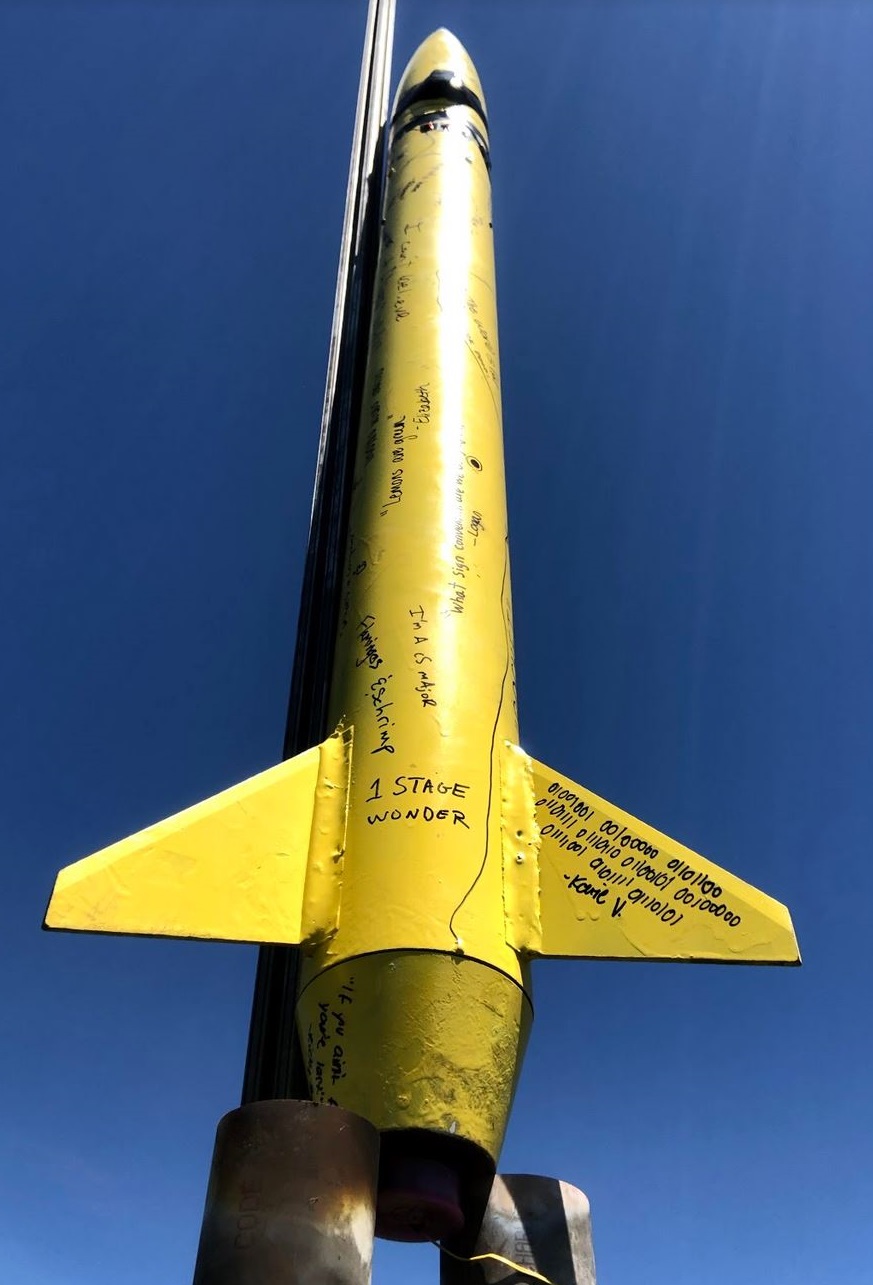
Long story short, we won 2nd place in the Midwest Rocketry Competition 2018 with The Lemon, pictured below:
We competed against 18 teams from various universities and high schools from around the region. Some had really advanced designs, with a custom PCB stack and servo controlled fins. Others simply had a piece of plywood where they strapped down an Arduino. We were somewhere in the middle in terms of complexity: we had a custom PCB that we soldered components onto and screwed into a 3D printed mount.
In a quick summary, the competition tasked teams to control the roll of the launched rocket. A rocket should be able to hold its position as well as go to any commanded position in terms of rotation. For example, an onboard sensor would be able to tell if the rocket has rotated twenty degrees from it's original position.
Problem
Rotating a rocket in flight is not easy, even more so when it has to rotate to a certain angle and hold that position. The size and weight of the components are limited to the size of the avionics bay, and the weight is limited by the amount of thust in the motor. Controlling the roll is another separate issue once some sort of actuation is achieved.
Design
We decided on a flywheel design because it seemed the simpliest to us and a previous team in the rocketry club had already made one before, so it was a proven design. The mechanical team was very proud of their design:
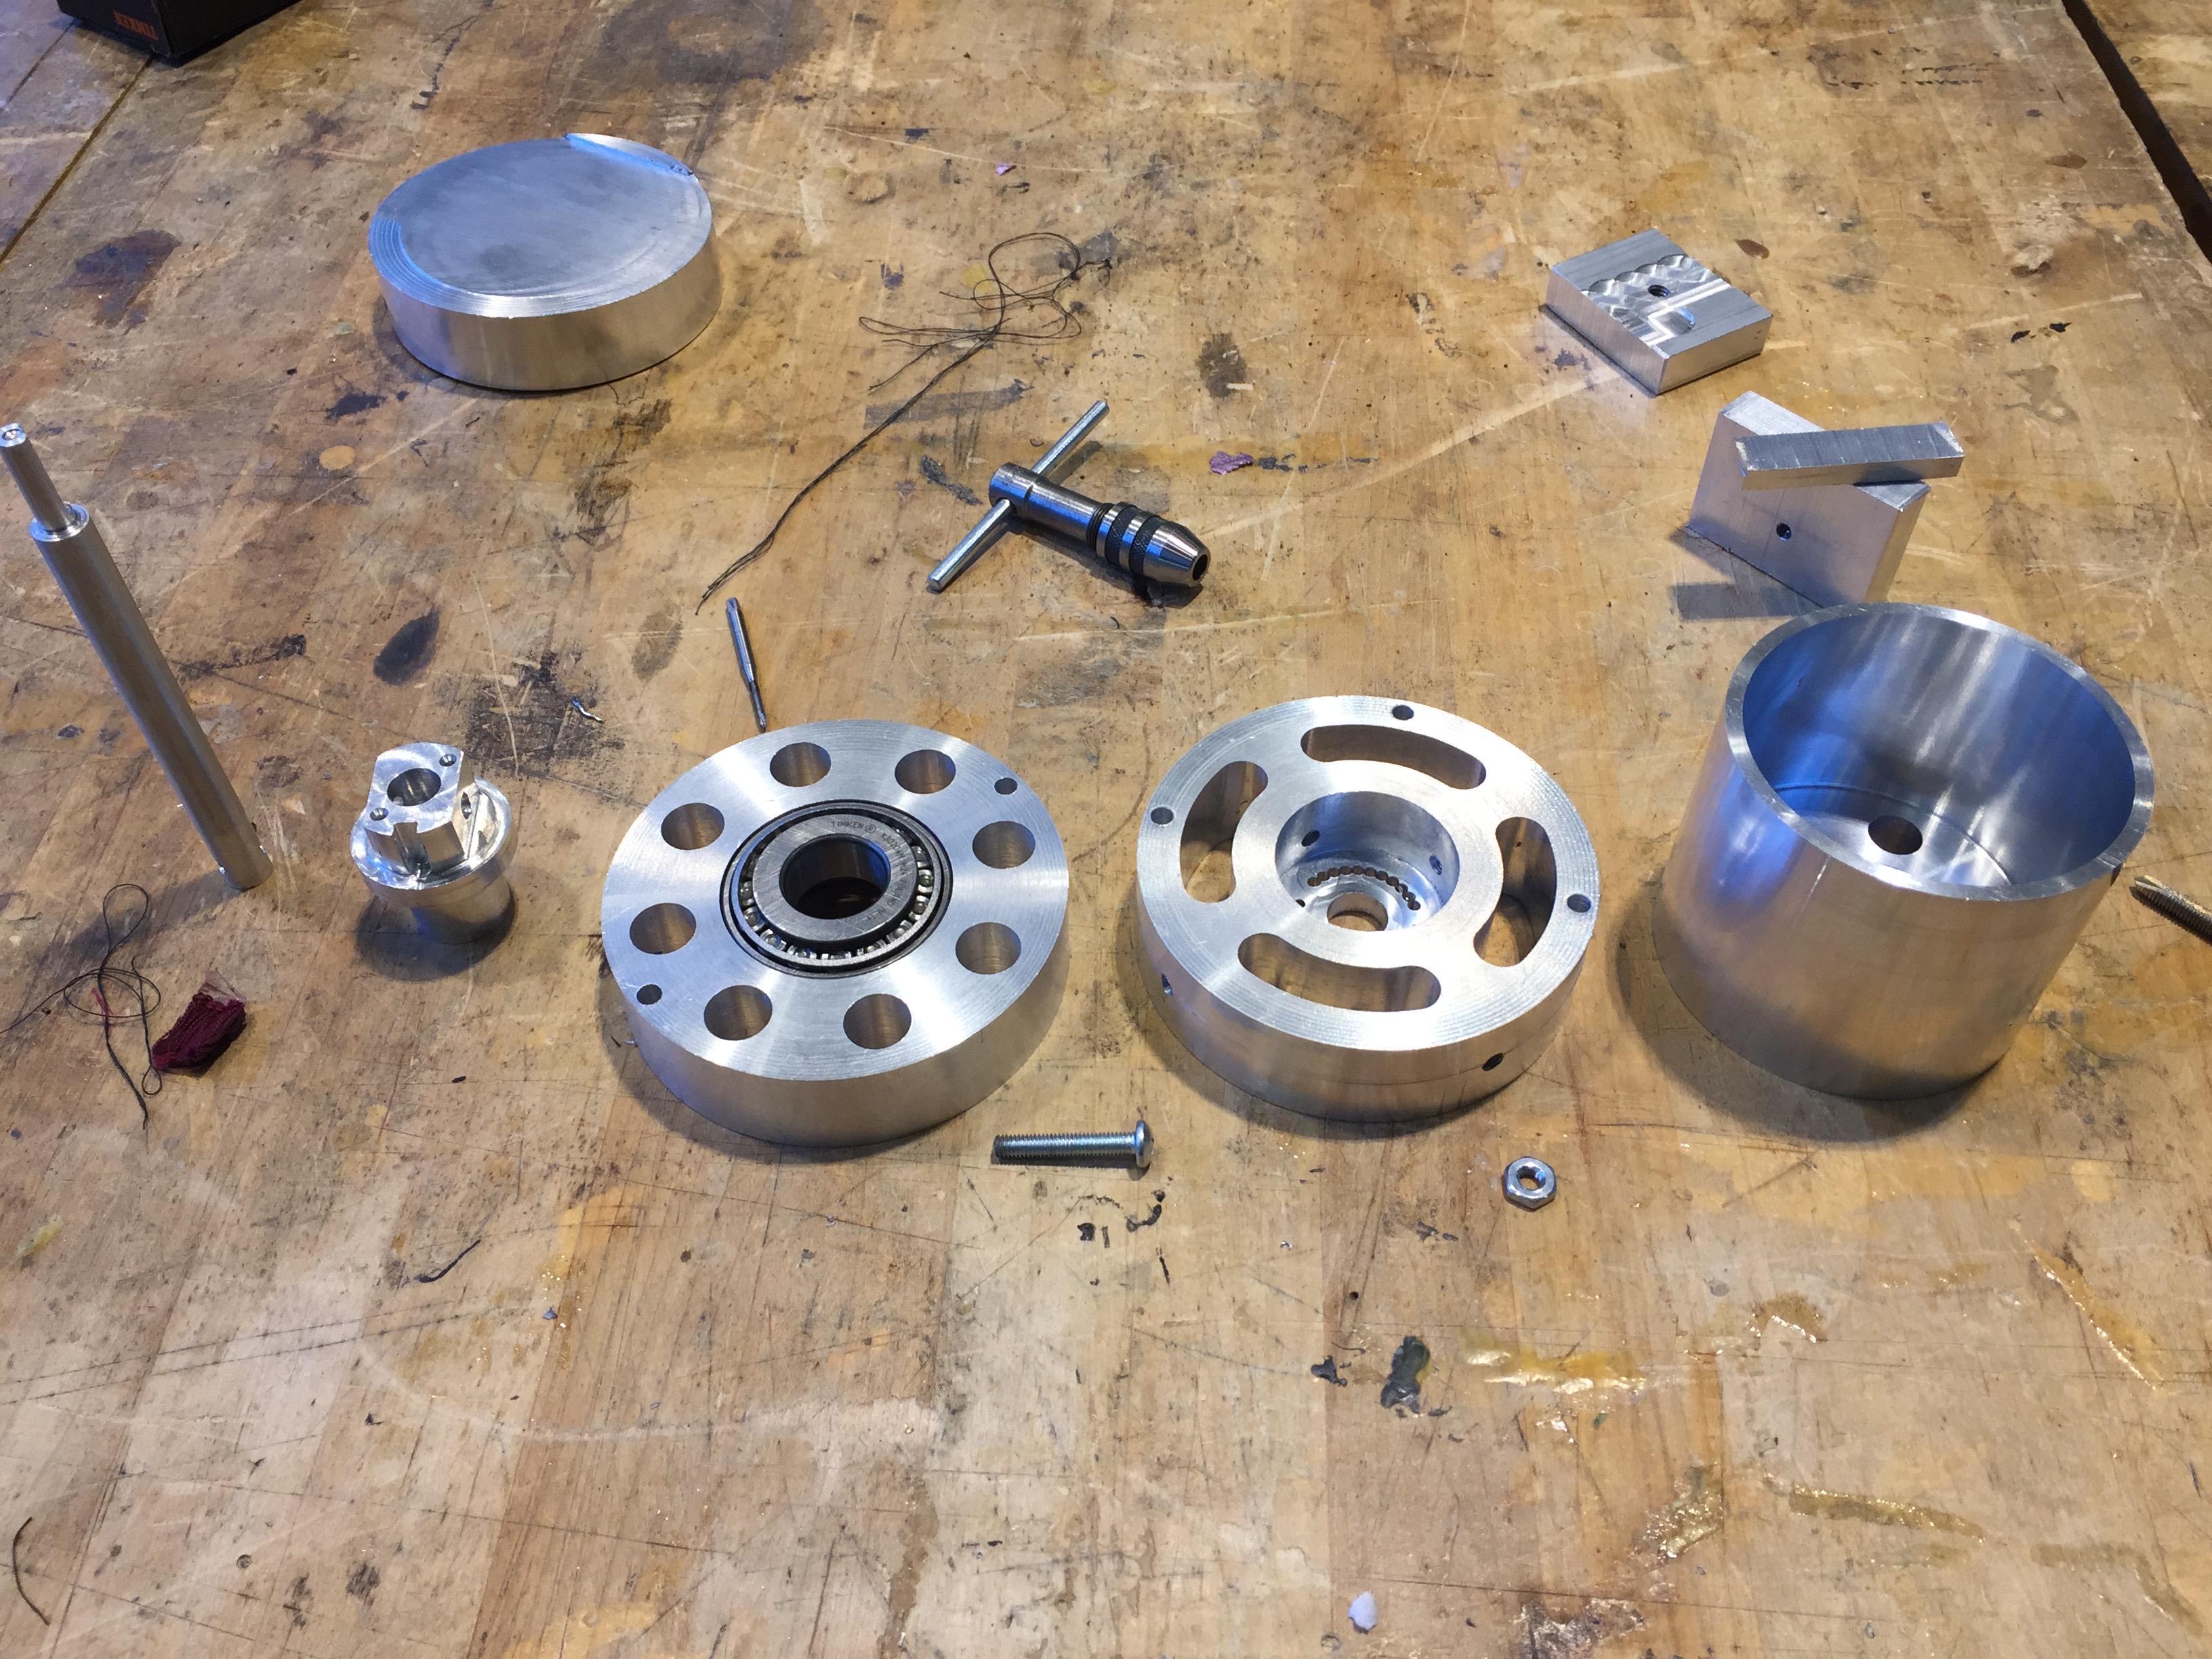
The flywheel, as manufactured and disassembled:
Reassembled:
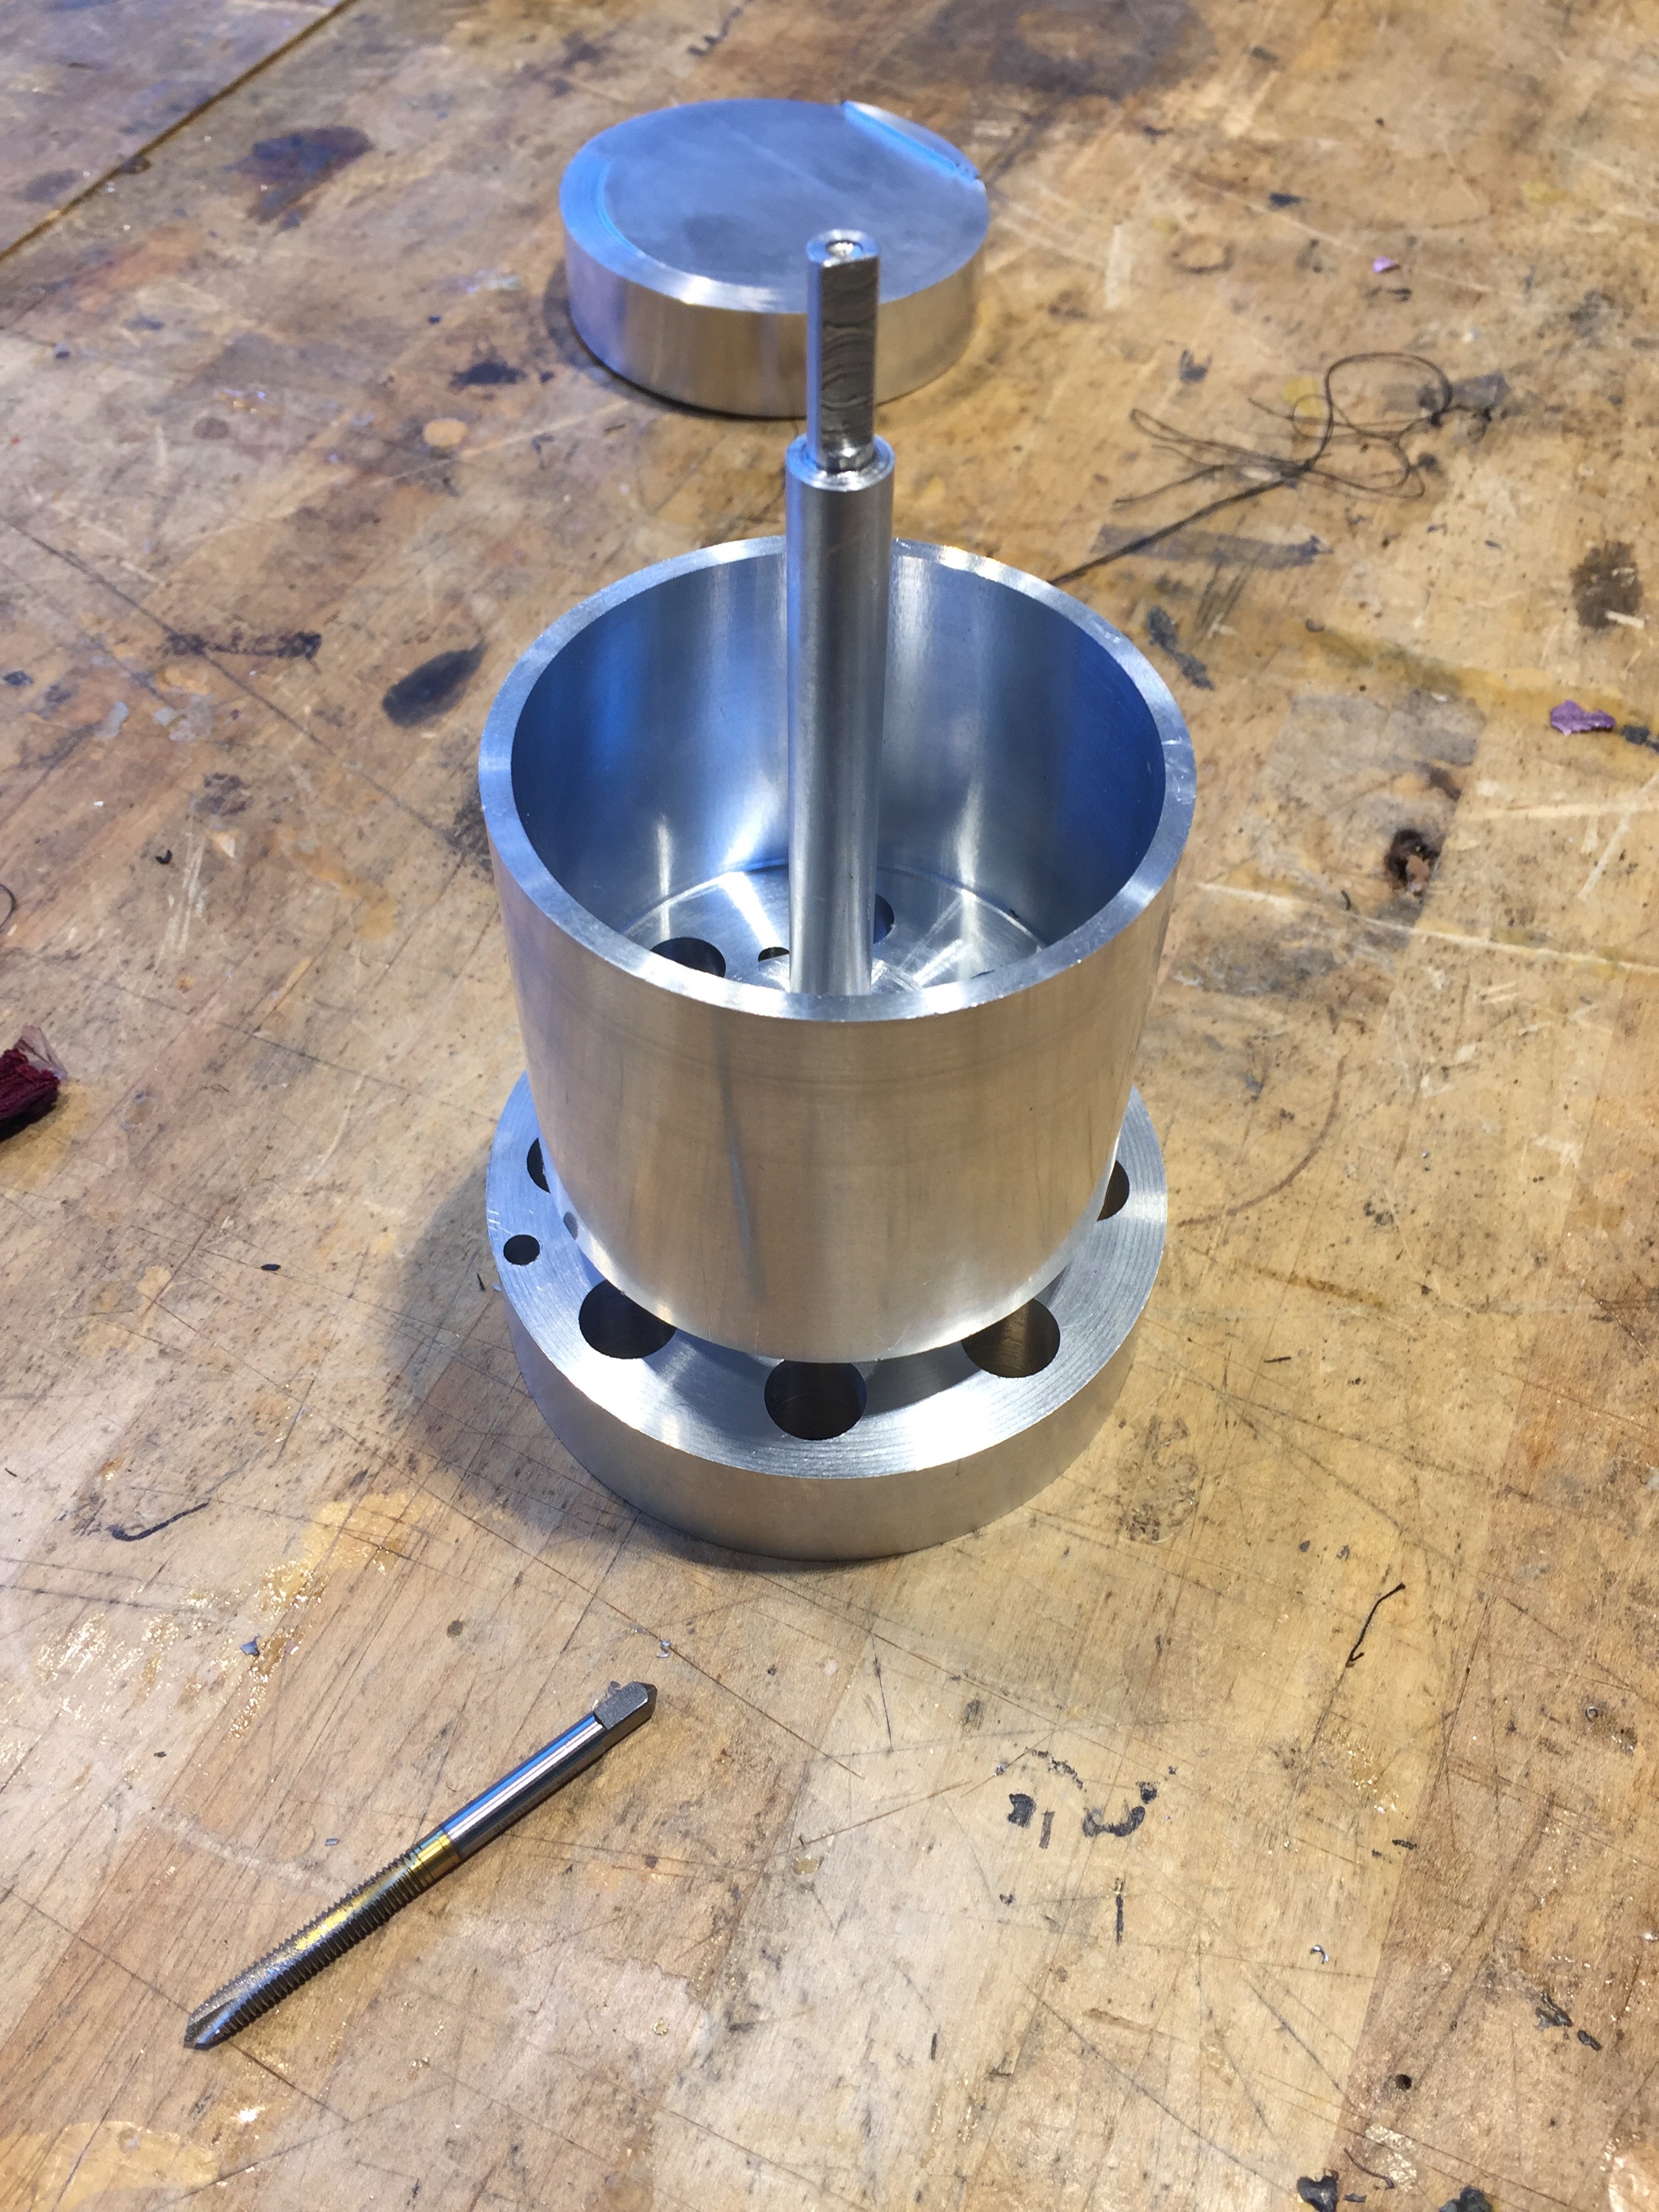
The flywheel is coupled to the motor, which was a cheap $7 555 drill motor that we bought from Ebay. It runs on a 12V Li-ion battery and worked surprisingly well in moving the rocket, given the known torque. The mounted electronics are shown below:
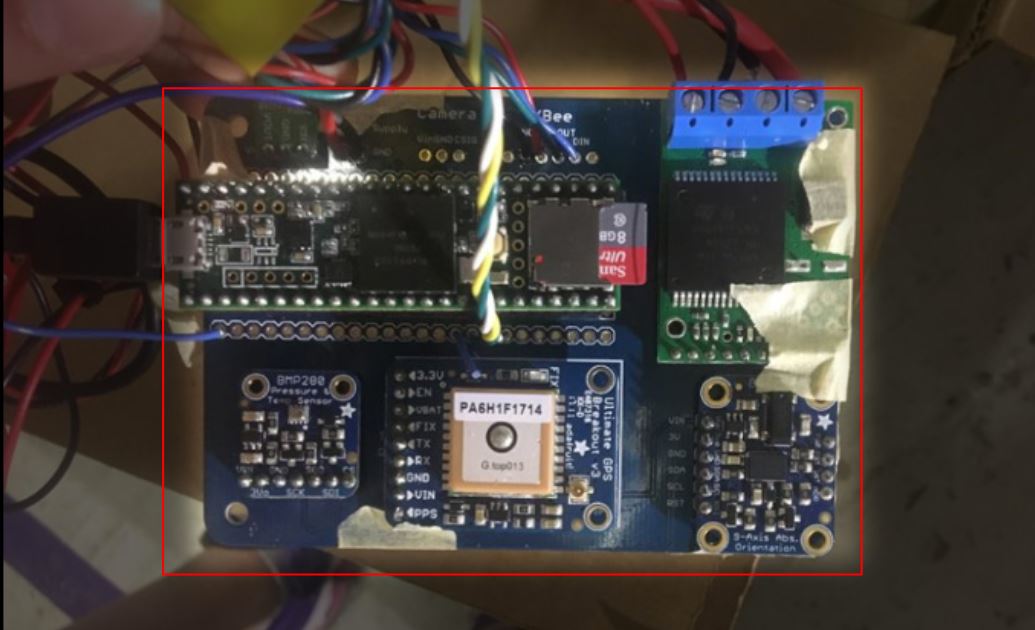
The brains of the operation was a Teensy 3.6 running at 180Mhz. Data was stored to the onboard SD card. It read data from a BMP280 altitude sensor and a BNO055 orientation sensor. From this data, it then calculated the desired effort and sent a signal to the motor driver. An Xbee was further included to communicate with the ground station.
Outcomes
There were several limitations in our testing capabilities. We did not have any way to test or model the rotating physics of the rocket in flight, so we had to depend on actual launches and our own calculations.
On the first flight, the electronics and the mechanical design was not done, so testing was only on the rocket's flight-worthiness.
On the second flight, the mechanical design was not done so the electronics was included in the flight only as data collection. We did not manage to capture a video because our camera was low on battery and failed during launch and only activated at apogee.
Our third flight was on the competition day itself. We got a great video, but were unable to verify if the rocket actually rotated. This was the same during the fourth flight, also on the competition day. However, some very nice points to note was that our rocket never came down ballistic, and the rocket did not CATO at the launch pad. So all four flights were safe and successful. Despite our rocket not being able to rotate, due to the quality of our documentation, we managed to clinch second place, which set a new record for the rocketry club.
Lessons
Our Xbees did not work once in the rocket on competition day. Reason unknown. Previous ground testing showed that the Xbees were working. Might want to cut a hole and use an antenna on the outside next time.
GPS was never used. Reason, we were always able to track the rocket.
SD card failed during flight so no data was collected. Reason, unknown. SD cards have a high rate of failure, so a better option might be to find some form of hard storage like flash or EEPROM.
Suspected power cut out during flight, resulting in nonsensical data on the SD card in the competition. Reason, the batteries might have been jostled loose during launch, resulting in a loss of power. Next time use the 9V soldered Procell batteries.
Breaking out the pins on the board was a good idea because some connections were wrong.
There are better ways to mount the camera other than taping it to the outside of the rocket. Some teams had external mounts, mirror systems, and generally better cameras than the $12 keychain camera that we used.
Other teams have never heard of a teensy and used Arduino Nanos. Some common complaints was the the Nanos ran out of space during programming.
Conclusion
Tl,dr. We won second place. Documentation is very good. Multiple lessons for future designs were learned.