Lightbeans Part 3, Making the Night Light, Functions

Now you've got all the tools you need to make the nightlight.
- Use a sensor to detect when it is dark
- Light an LED when it is dark
- Turn off the LED when it is bright
This is the basic requirement for making a nightlight. I suggest using the RGB led with a subtle fading effect to make a more pleasant to look at. You might also want a diffuser such as a ping pong ball, or some kind of frosted glass enclosure to diffuse the light.
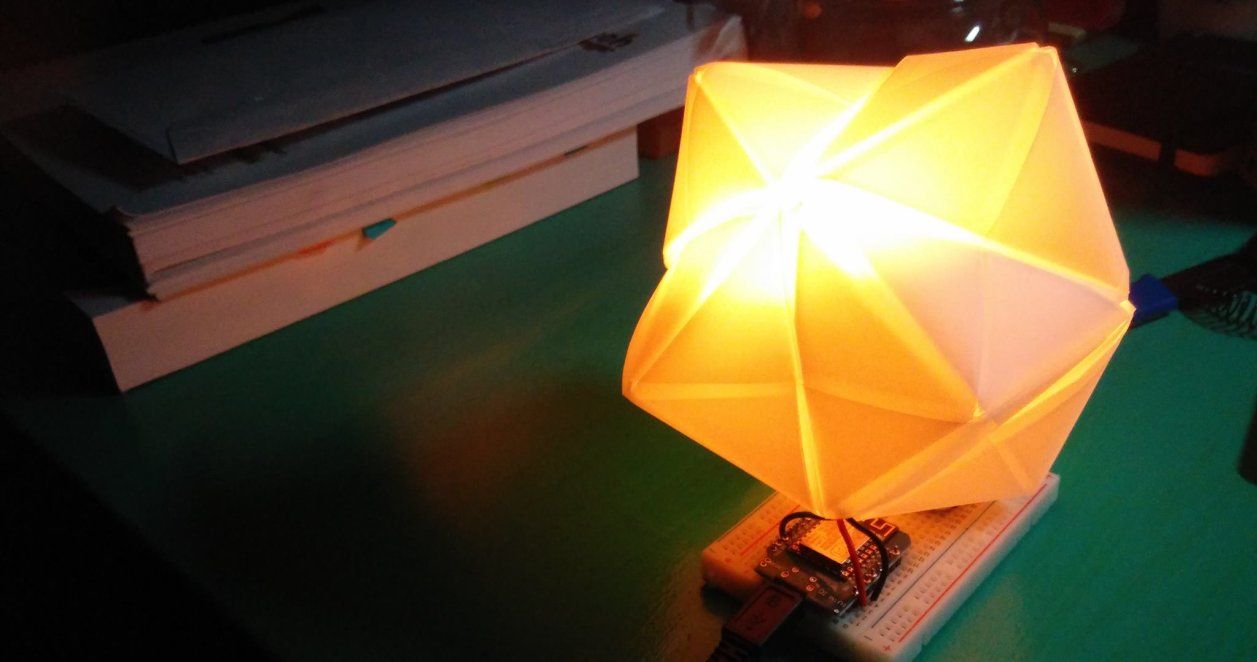
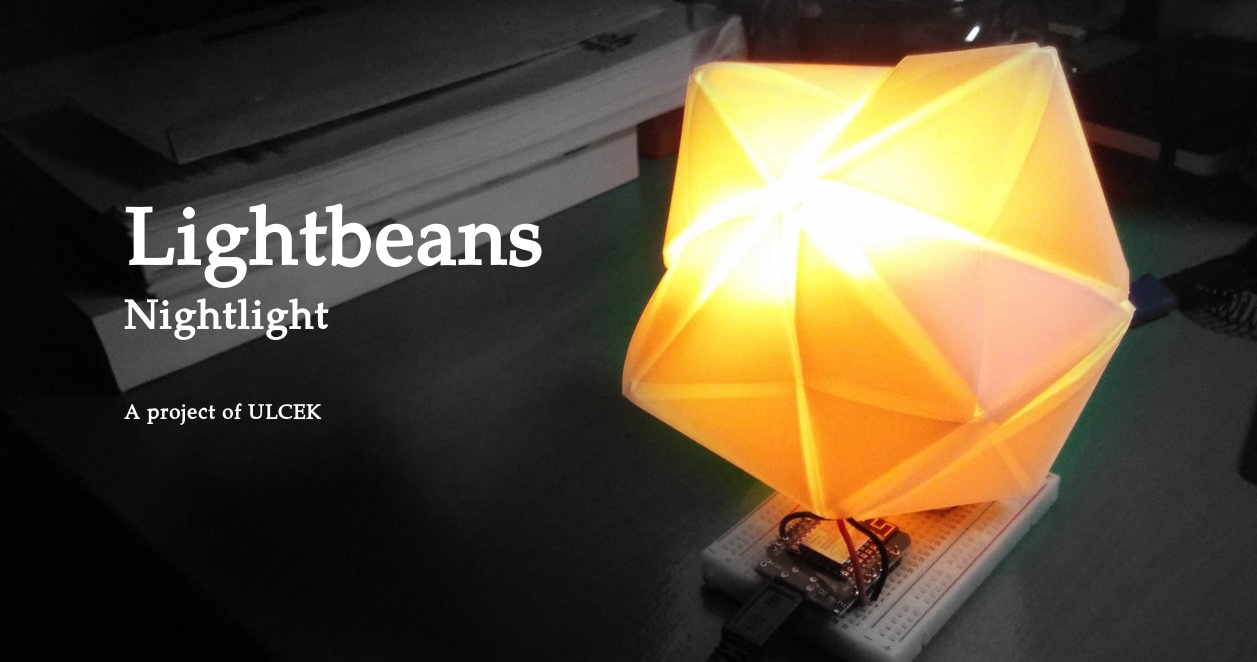
I used an origami sonobe octahedron made from thin plastic and placed a ring of 12 5050 LEDs inside. The original idea came from my friend Alyssa Liu who is the founder of Hazumi, a startup which is designing a star-shaped device called Stella for a social music experience. I find that the thin plastic diffuses the light most wonderfully, and it lights up the edges in particular, making it seem like it is highlighting the shape.
The tutorial that I used to learn how to make the diffuser is available on Youtube here.
We will reuse our earlier code:
#include <Adafruit_NeoPixel.h>
#define NUMPIXELS 1 \\ change if you have more pixels
#define PIN D1 \\ config for ESP8266
#define INPUT_PIN A0 \\ config for ESP8266
#define BRIGHTNESS ... \\set this as the threshold value for darkness

int r = 0;
int g = 0;
int b = 0;
int input_value = 0;

Adafruit_NeoPixel pixels = Adafruit_NeoPixel(NUMPIXELS, PIN, NEO_GRB + NEO_KHZ800);
void setup()
{
    Serial.begin(9600); \\ config for ESP8266
    pixels.begin();
}


void loop()
{

    input_value = analogRead(INPUT_PIN);
    Serial.println(input_value);
    \\if(...){
    \\  ...
    \\}
    delay(10);
}
This is the base code. So how should we start?
First we determine what we are reading by printing out the values that the LDR detects in a bright room, and then in a dark room. The middle of these two values would then be the threshold value, which is the value that the chip detects when it is bright and dark. Go ahead and write in the value next to BRIGHTNESS. Now we can compare BRIGHTNESS with our current value to determine if the room is bright or dark.
Next we want some sort of loop to do exactly this.
if (input_value<BRIGHTNESS){
  ... // do what you want here when dark
}

else {
  ... // do something when bright
}
We want the light to be off when it is bright
else {
  turn_off();
}
What we have done here is to define a function. A function helps us to keep our code neat and organised because it separates some part of the code into another section for easier readability. It is sort of like an engine. You put fuel in, and you get power out. You don't want the engine to be whirring beside you when you drive, so we tuck it into the hood of the car, which is sort of the same thing for functions.
Below main we will write our turn_off() function. This is what is run when the code hits the point turn_off() in our main loop. The following is how you write a function to turn off all the pixels.
void turn_off(){
  for(int i=0; i<NUMPIXELS;i++){
    pixels.setPixelColor(i,pixels.Color(0,0,0)); // set the color to (0,0,0), off!
  }
  pixels.show();
}
Now if I asked you to write a function to turn on all the pixels, could you do it?
void turn_on(){
  r=100; // set RGB values
  g=30;
  b=70;
  for(int i=0; i <NUMPIXELS;i++){
    pixels.setPixelColor(i,pixels.Color(r,g,b));
  }
  pixels.show();
}
Excellent. Now you will have to insert it at some point in the code. The code for turn_on() should be below turn_off(). But we have to tell main to look at it at some point, so where should it be included?
if (input_value<BRIGHTNESS){
  turn_on(); // here!
}
Now you have working code that you can use for your nightlight! Go ahead and upload your code and enjoy your nightlight.
Sketch
#include <Adafruit_NeoPixel.h>

#define NUMPIXELS 12
#define PIN D6
#define INPUT_PIN A0

#define HOUR 00

int pinval;
int i = 1;
int count = 0;

Adafruit_NeoPixel pixels = Adafruit_NeoPixel(NUMPIXELS, PIN, NEO_GRB + NEO_KHZ800);
void setup() {
  pixels.begin();
  Serial.begin(9600);
  pinMode(INPUT_PIN, INPUT);

}

void loop() {
  // put your main code here, to run repeatedly:
  pinval = analogRead(INPUT_PIN);
  if (pinval < 900) {
    fadeIn();
  }
  if (pinval > 900) {
    fadeOut();
  }
}


void fadeIn() {
  if (count < -30 || count > 30) {
    i = -i;
  }
  count = count + i;
  for (int j = 0; j < NUMPIXELS; j++) {
    pixels.setPixelColor(j, pixels.Color(128 + count, 44 + count, 0));
  }
  pixels.show();
  delay(100);
}

void fadeOut() {
  for (int j = 0; j < NUMPIXELS; j++) {
    pixels.setPixelColor(j, pixels.Color(0, 0, 0));
  }
  pixels.show();
  delay(1000);
}
What you learned
- How to write a function
- How to combine code from other projects
Additional projects
- Include a button to turn off the night light.
- Include animations for the light when it detects a quick dip in light intensity, like a hand going over it.
- Convert colors to a more 'natural' scale. Currently you get yellow when you try to set orange.
Final Touches
Some final touches would be to animate the night light a little so that it looks prettier. It can be a fade effect or a color change effect.
You can look in the Examples under Files in the Arduino IDE, under Basics is the code for Fade. That will allow you to fade an LED. Convert that code to fade your 5050 RGB LED to different colors.
You can also use the light as a clock. Have it change colors gently every few seconds, and change to another color when an hour has passed. This function is inspired by PRISMATIME.
Conclusion
Congratulations! You have completed Lightbeans, the first series of tutorials in getting to know your ULCEK kit better. The next series of tutorials will be aimed at the IOT abilities of the ESP8266.
The next series of tutorials is Webroots where we use the wifi-capabilities of the ESP8266 to create an accurate clock of our Lightbeans project and give it an ability to talk on Twitter!
Next Project
[Webroots 1](http://westsideelectronics.com/webroots-1)