Building an IoT Pomodoro-Weather Thingy


A little desk thingy that can report the weather outside and serve as a Pomodoro timer. I call it the Able Stable.
Background
I often find myself checking on the weather before I go out. Sometimes the weather can be bitterly cold, and other times it can be warm enough to stroll in, but it is hard to tell just by looking out of the window. Since I work at my desk most of the time, it is useful to have productivity enhancing tools such as a Pomodoro timer nearby.
This project started out of the components found in ADABOX 003, which is a subscription service provided by Adafruit. They send out boxes of curated electronics quarterly that are designed around a few projects. I do recommend these boxes for beginners as they are centered around a few projects and Adafruit supplies high quality parts.
In the Able Stable's first iteration, it was an ESP8266 Feather with an OLED Feather mounted directly on top, both of which came in ADABOX 003. These boards were plugged directly into a breadboard, and were wired up to a DHT sensor and a photosensor that sent data back to the Adafruit IO.
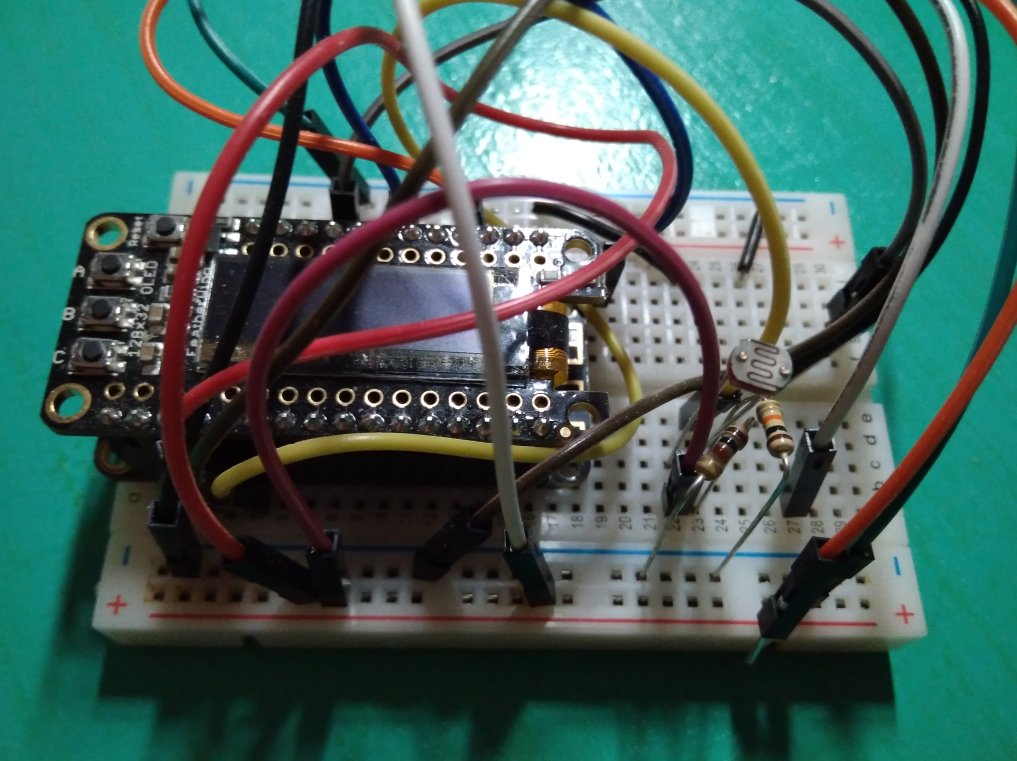
Over time, I found that I really used only two aspects of my system: weather updates, and the pomodoro feature. Another problem was the mess of wires on the breadboard made it difficult to press the small buttons on the Adafruit OLED Feather. So I decided to pare down the system as well as transition it to a more permanent installation.
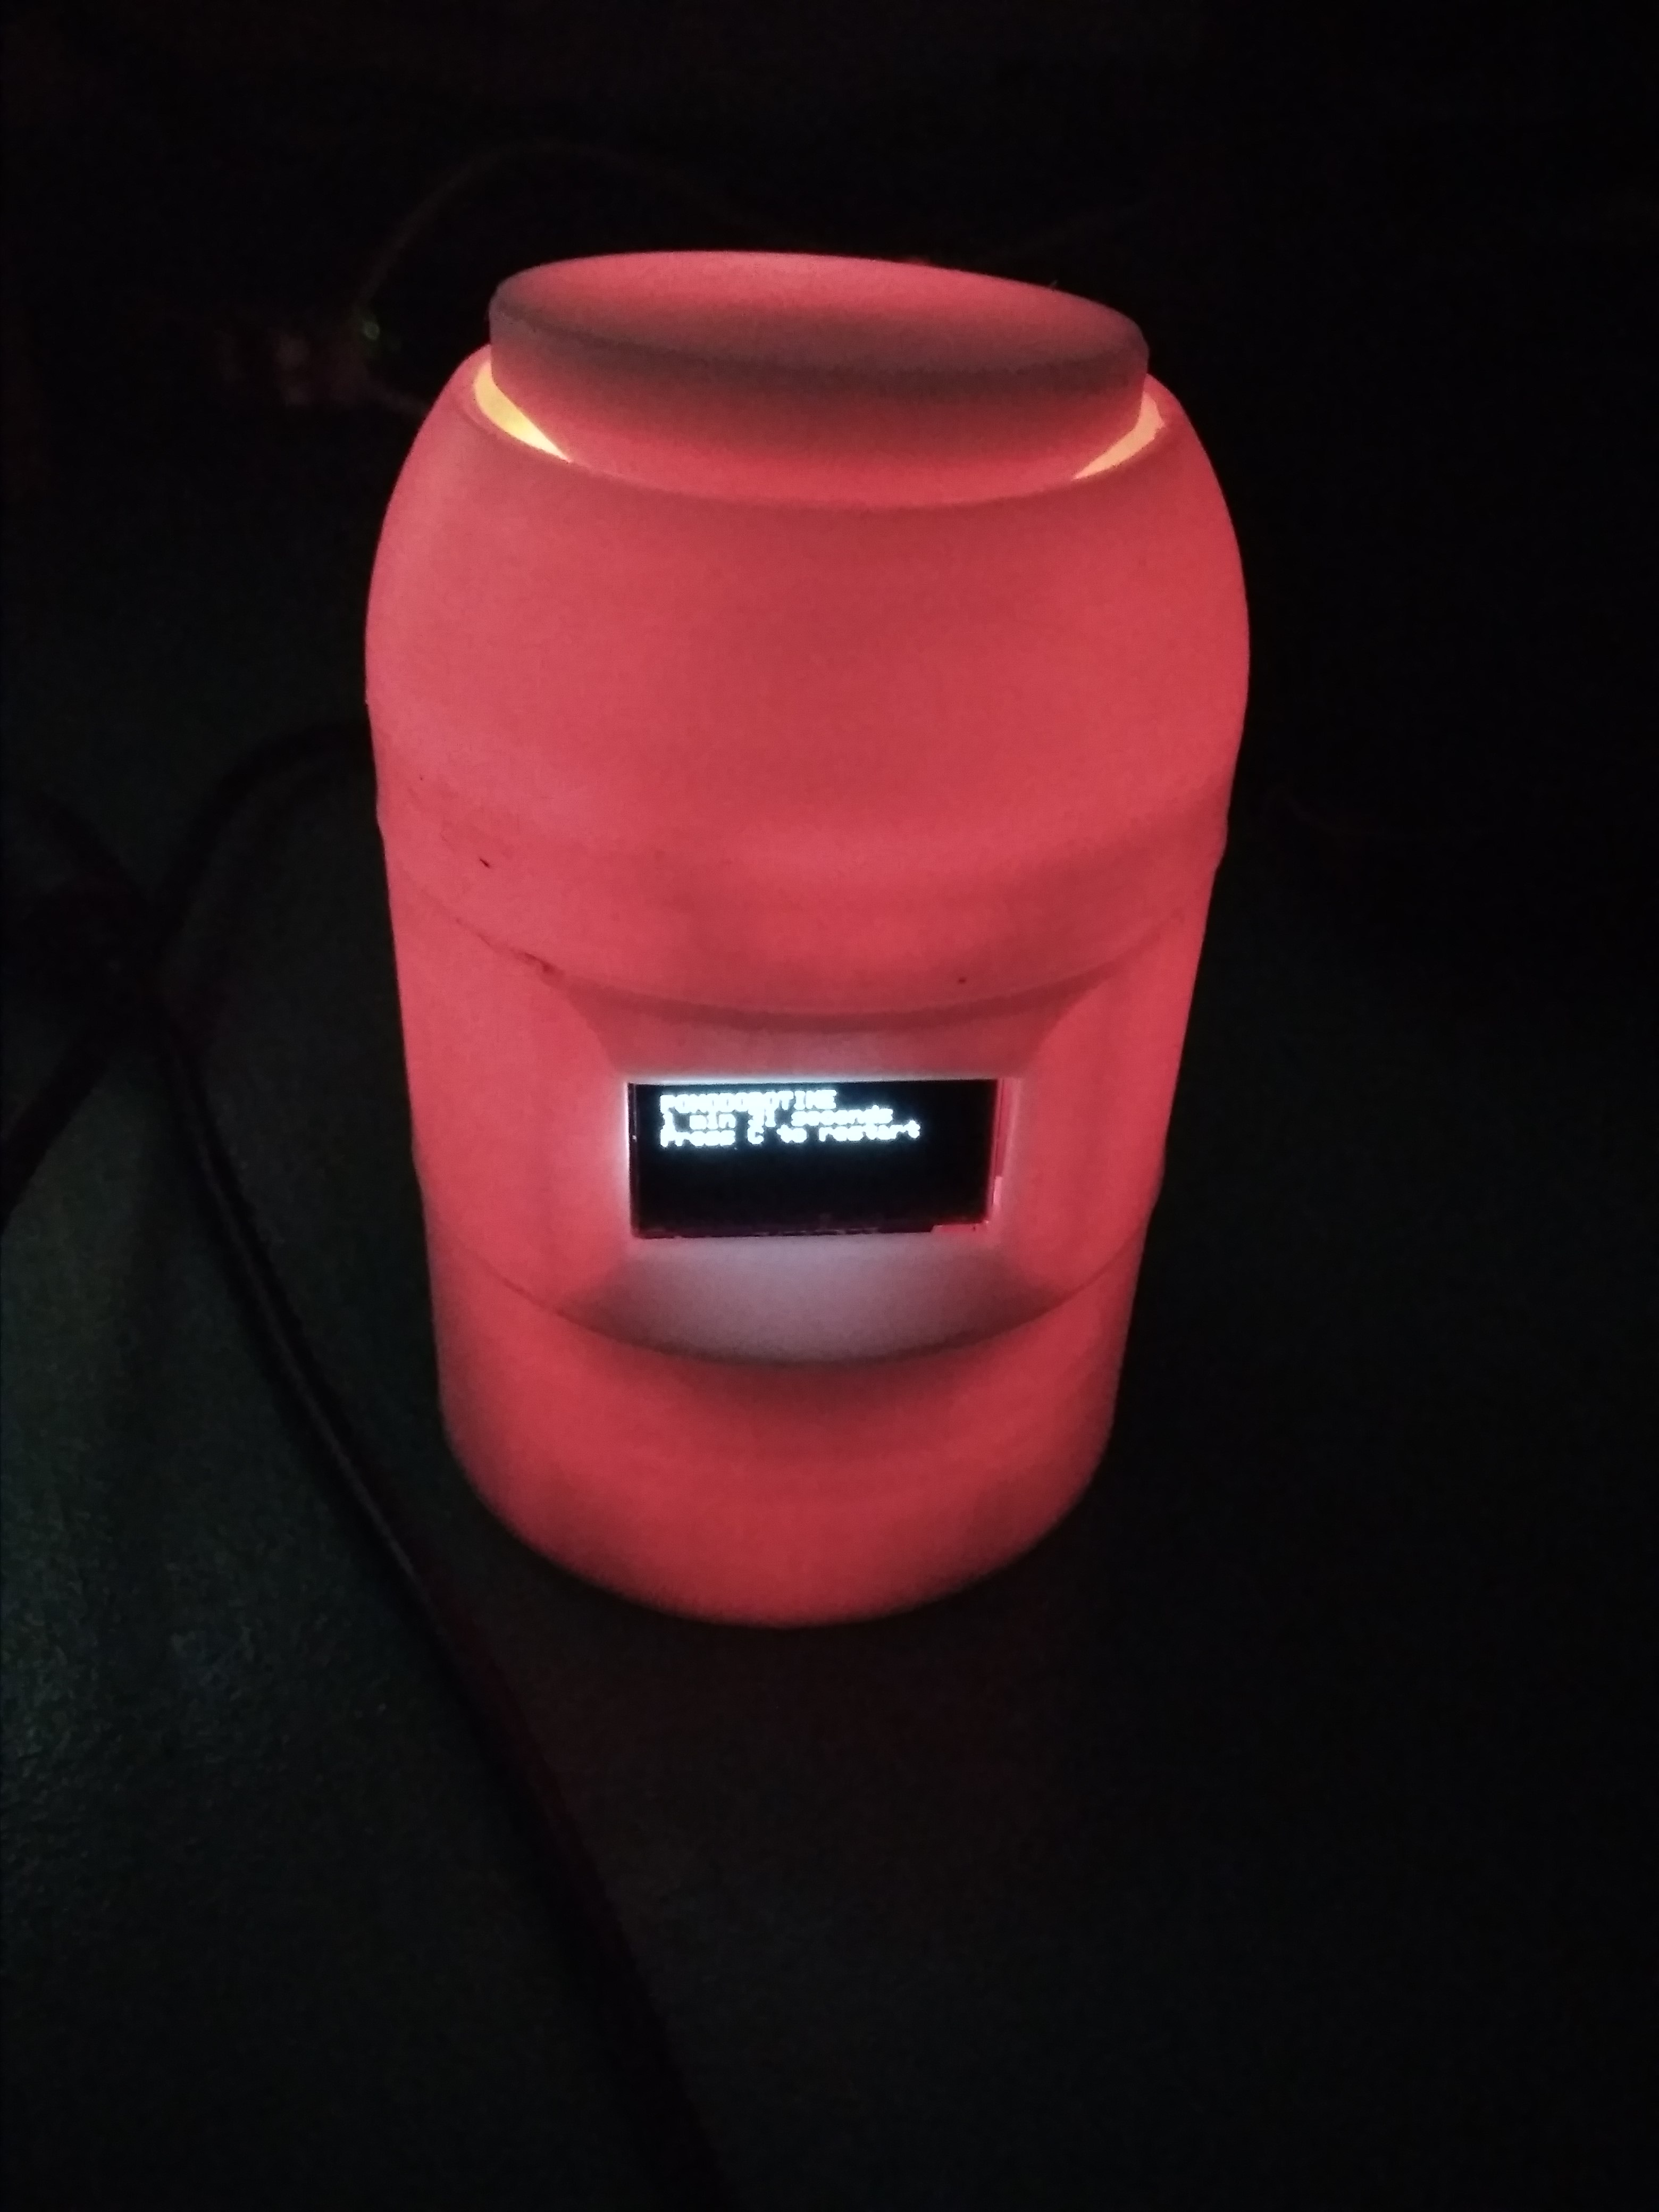
Meet the Able Stable
Hardware
The Able Stable is based off the WeMos Mini. The footprint of this board is small, and there are many shields available for it. In my project I used female headers on the WeMos Mini and long-legged female headers for the prototyping shield that I stacked on top.
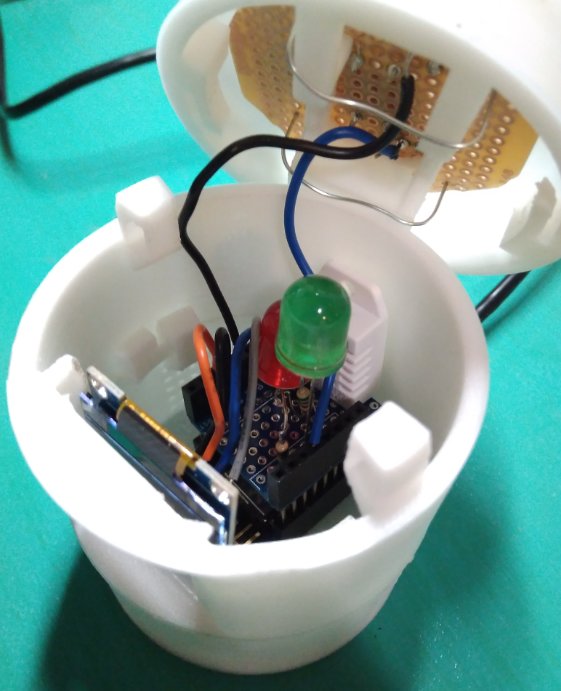
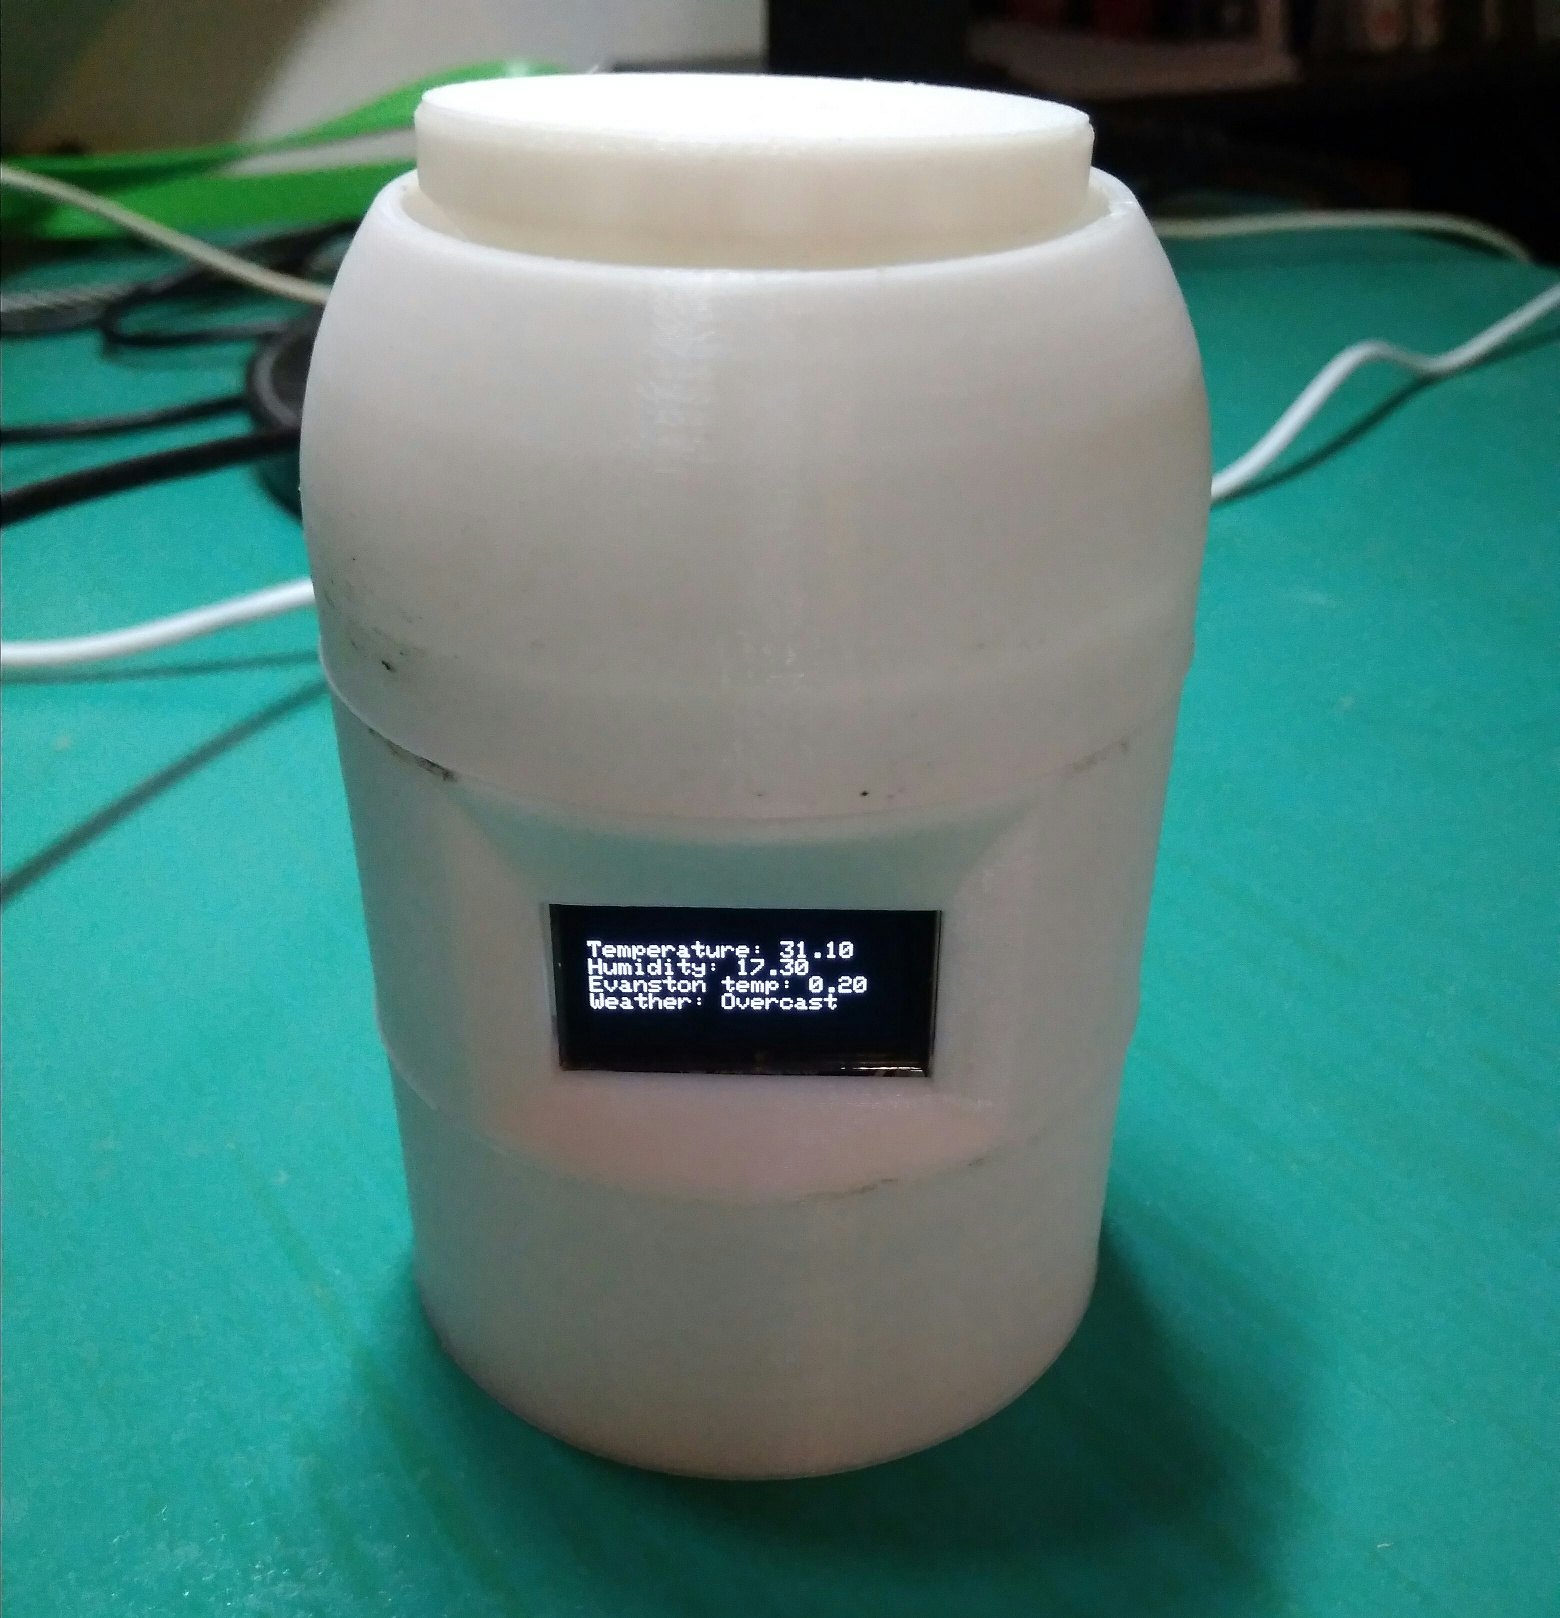
The DHT22 sensor and two 10mm LEDs are mounted on the prototyping shield. They are connected to digital pins D0 and D6 on the WeMos. The DHT22 sensor can detect temperature and humidity, and it is connected to D7 of the WeMos. I used a cheap 128x64 OLED module as my screen, which was connected to pins D1 and D2 to communicate over I2C.
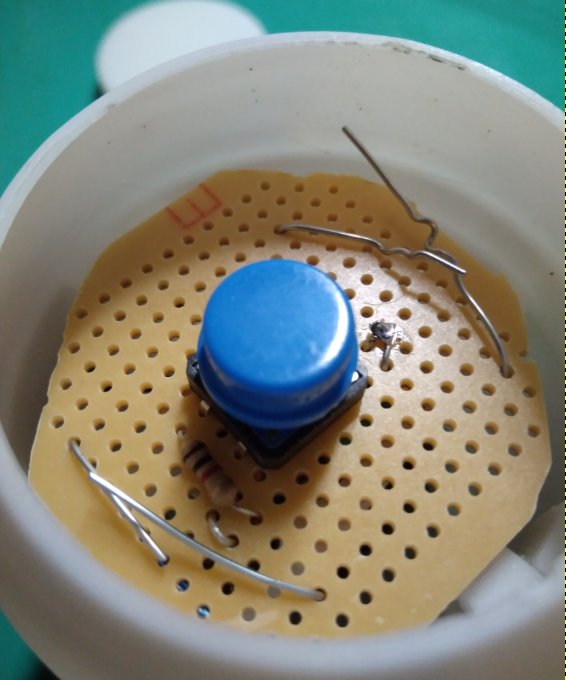
The button on top is a 8x8mm button is pulled up to 3.3V and connected to D5 on the WeMos. It is covered by an 3D printed cap that is free to move, so whenever the cap is pressed, the button is activated.
I used the modular case by vutana, and the WeMos just fits where the USB jack is. The module for the OLED screen was too small, and I ended up having to pry apart the holders to fit my screen in. I initially wanted to use a NeoPixel for lighting, but I decided against it as I wanted a more diffused light.
The original intention was to have a full dome, but the 3D printer stopped in the middle of the print, so I was left with a half-printed dome. However, I realised that I could improvise and turn the top of this half- dome into a button by having a separate piece that fit in the hole. This turned out to be a great idea, because the large top button was easier to press as compared to the button module. It also makes for a more compact shape for the Able Stable.
One improvement I would make is to increase the size of the button so that it sits better in the hole, because as of now, it jiggles around a little.
I had to modify my code to reflect the hardware changes because on the Feather OLED, I had three buttons, now I was reduced to using one button.
Software
In the code I used Wunderground to obtain the weather outside from the internet, and displayed it with the data that from the DHT22 sensor in the environment screen. If the Able Stable's state was changed to the pomodoro screen, a red LED would turn on and a timer is started. Once the pomodoro is complete and a green LED would light up, providing visual feedback that the pomodoro is complete. The timer is restarted every time the Pomodoro is started. However, this makes sense because if I was in a pomodoro, then I would not need to know the weather outside.
An improvement I would make to the software is to display the weather in 3 hours and remove the DHT sensor, because I never used data that it generated. It doesn't really matter to me how warm my desk area is in degrees celcius, as long as I am comfortable, and likewise for the humidity. Mounting the DHT sensor right above the ESP8266 sensor also causes the reported temperature to be consistently higher than the surrounding temperature as the ESP8266 generates a significant amount of heat when in operation. Therefore if I still wanted a DHT sensor in the future, I would point it away from the ESP8266, and create a hole in the housing so that it can sample the external temperature and humidity.