Wireless Soil Sensor
Building a wireless soil sensor for plant monitoring! Featuring the BG22 Thunderboard and plenty of Bluetooth shinanigans.


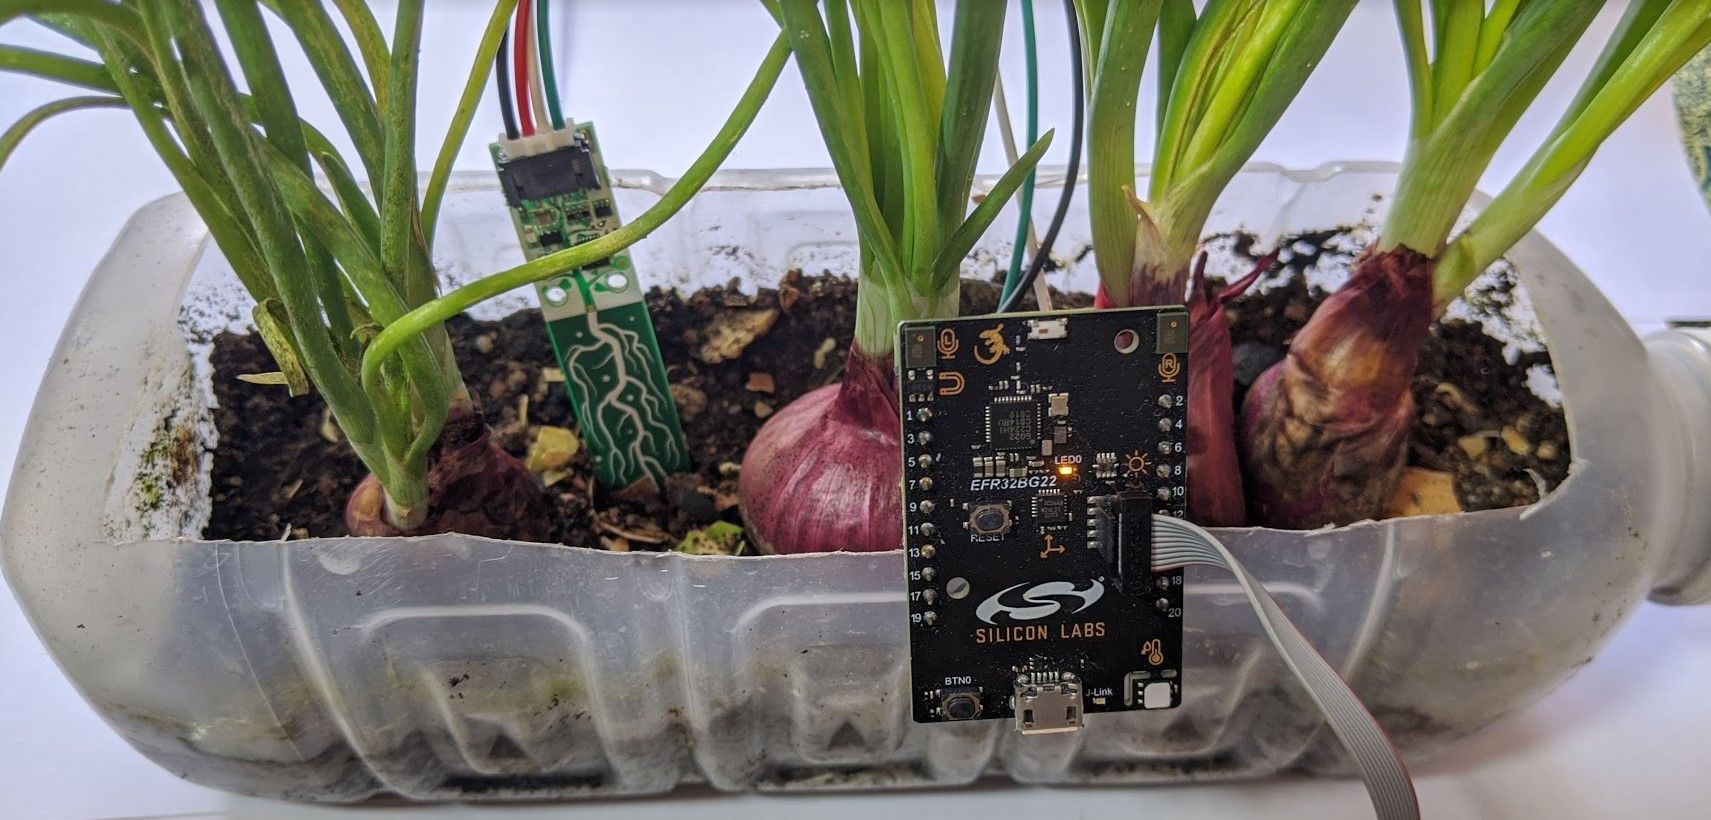
One project that I've always been interested in implementing is a soil sensor because I frequently forget to water my plants and then compensate by flooding the pot (my poor plants). While there are a ton of soil sensors out there, I decided to implement my own with a twist of adding bluetooth functionality to it so as to have a low power node to collect data about soil conditions periodically.
With this information, you can either water the plants yourself, or create a motorized system to water the plants for you, keeping the soil at an optimum moisture level at all times.
Some people might argue that you could do the same with bottle of water and a piece of cloth, or with a ceramic water dispenser that gradually releases moisture into the soil, but with this system, you can control how wet or dry the soil is, or even periodically cycle the moisture level as desired/required.
Research and Parts
This project uses and demonstrates the I$^2$C and timers of the Silabs SDK with BLE integration to read the sensor data. For this project I'm using an Adafruit Seesaw Soil Sensor.
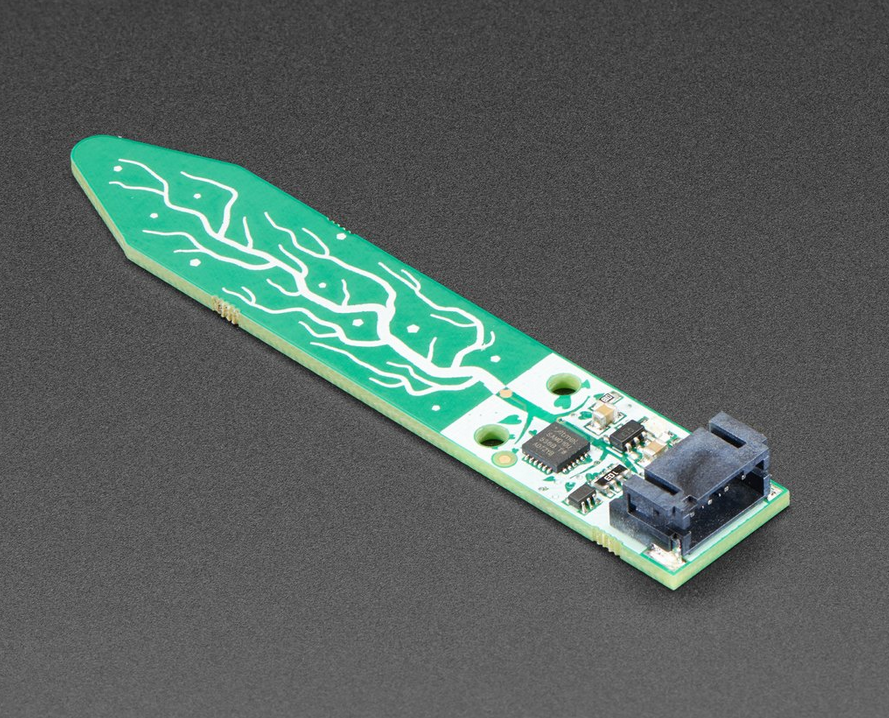
It is a SAMD10 microcontroller pressed into service as a capacitance and temperature sensor with an I$^2$C interface that you can use to read the data. By sticking it into the soil, we can detect how wet the soil is, and determine if we need to take action.
Programming
While the I$^2$C interface for the seesaw is not very well documented, the code to read capacitor and temperature data is given in terms of an Arduino sketch: soilsensor_example.ino.
 adafruit
Examining the relevant portion of the Adafruit_seesaw.cpp file yields the code below for reading the capacitance. This value can be matched to how wet the environment around the sensor is:
uint16_t Adafruit_seesaw::touchRead(uint8_t pin) {
  uint8_t buf[2];
  uint8_t p = pin;
  uint16_t ret = 65535;
  do {
    delay(1);
    this->read(SEESAW_TOUCH_BASE, SEESAW_TOUCH_CHANNEL_OFFSET + p, buf, 2,
               1000);
    ret = ((uint16_t)buf[0] << 8) | buf[1];
  } while (ret == 65535);
  return ret;
}

...

void Adafruit_seesaw::read(uint8_t regHigh, uint8_t regLow, uint8_t *buf,
                           uint8_t num, uint16_t delay) {
  uint8_t pos = 0;

  // on arduino we need to read in 32 byte chunks
  while (pos < num) {
    uint8_t read_now = min(32, num - pos);
    _i2cbus->beginTransmission((uint8_t)_i2caddr);
    _i2cbus->write((uint8_t)regHigh);
    _i2cbus->write((uint8_t)regLow);
    _i2cbus->endTransmission();

    delayMicroseconds(delay);

    _i2cbus->requestFrom((uint8_t)_i2caddr, read_now);

    for (int i = 0; i < read_now; i++) {
      buf[pos] = _i2cbus->read();
      pos++;
    }
  }
}Breaking it down, the microcontroller controlling the seesaw sends two bytes via I$^2$C, and waits for 1000us before requesting two bytes of data from the seesaw, which is then combined to get the measured capacitance value.
Converting I$^2$C Arduino code to Silabs API
For the Silabs API, individual I$^2$C read and write functions are condensed into a common function I2CSPM_Transfer(). Instead of using individually named functions, a struct indicating the read/write process and data is passed into this function.
typedef struct {
  uint16_t addr;

  /** Flags defining sequence type and details, see I2C_FLAG_ defines. */

  uint16_t flags;

  /* Buffers used to hold data to send from or receive into */
  struct {
    /* Buffer used for data to transmit/receive, must be @p len long. */
    uint8_t  *data;

    /* Number of bytes in @p data to send or receive. */
    uint16_t len;
  } buf[2];
} I2C_TransferSeq_TypeDef;The code that is used on the Arduino can be translated into a similar I$^2$C process on the BG22 as follows:
- Enable the I$^2$C software component (
I2CSPM) in the.slcpfile using the project configurator. - Include the created instance (
sensor) into theapp.cfile. - Write the code to interface with the soil sensor.
#define SEESAW_TOUCH_BASE 0x0F
#define SEESAW_TOUCH_CHANNEL_OFFSET 0x10
#define SEESAW_I2C_ADDR 0x36

...

static void usr_read_soil_sensor() {
    I2C_TransferSeq_TypeDef seq;
    I2C_TransferReturn_TypeDef ret;
    uint8_t buf[2];

    sl_status_t retval;
    uint16_t capval = 65535;
    retval = SL_STATUS_OK;

    seq.addr = SEESAW_I2C_ADDR << 1;
    seq.flags = I2C_FLAG_WRITE;

    /* Select register to start reading from */

    uint8_t cmdbuf[2] = {SEESAW_TOUCH_BASE,SEESAW_TOUCH_CHANNEL_OFFSET};
    seq.buf[0].data = cmdbuf;
    seq.buf[0].len = 2;

    /* Select length of data to be read */
    ret = I2CSPM_Transfer(sl_i2cspm_sensor, &seq);
    if ( ret != i2cTransferDone ) {
     retval = SL_STATUS_TRANSMIT;
    }
    USTIMER_Delay(1000);

    seq.flags = I2C_FLAG_READ;
    seq.buf[0].data = buf;
    seq.buf[0].len = 2;

    ret = I2CSPM_Transfer(sl_i2cspm_sensor, &seq);
     if ( ret != i2cTransferDone ) {

       retval = SL_STATUS_TRANSMIT;
     }

     capval = ((uint16_t)buf[0] << 8) | buf[1];

     /* Update data */
     sl_app_log("Cap: %d \n",capval);
}Adding Simple Timer to poll the sensor
Another useful bit of abstraction that Silabs has provided is a software component called Simple Timer. It can be used as either a one shot timer or a periodic timer, and it will call a function when it reaches the end of the timing period. Think of this like a timer compare in a superloop to trigger events at different times.
With this service, setting up the timers and keeping track of events is abstracted away from the main loop, keeping everything nice and tidy.
This is done by enabling the service under Project Configurator > Bluetooth > Simple Timer Service.
In app.c:
#include "sl_simple_timer.h"

...

static void usr_read_soil_sensor(void); // the function to read the soil sensor

// Timer
#define READ_PERIOD 500
static sl_simple_timer_t read_sensor_timer; // timer struct

...

SL_WEAK void app_init(void)
{
  ...

  sl_status_t sc;

  sc = sl_simple_timer_start(
  	&read_sensor_timer,   // timer struct
    READ_PERIOD,          // period
    usr_read_soil_sensor, // callback function
    NULL,                 // pointer to data passed to callback
    true                  // reload timer
  );
  sl_app_assert(sc == SL_STATUS_OK,
                "[E: 0x%04x] Failed to start sensor timer\n",
                (int)sc);

  ...
}
So at this point the sensor can be read from the debug UART output, and it is triggered every 0.5 seconds.
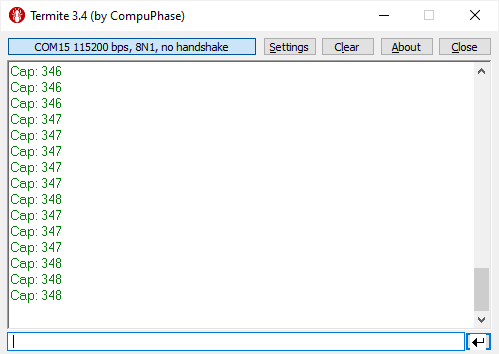
Just for info, wet soil gives a reading of roughly 1000 whereas dry air is 348.
Publishing data over BLE
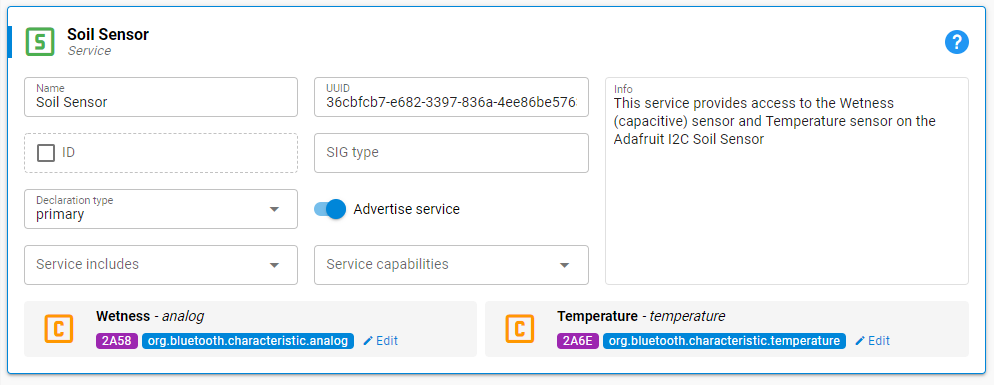
Setting up a BLE GATT Service is easy with Silabs. In Software Components > Advanced > Advanced Configurators, a BLE service can be set up with a few short clicks with some standard characteristics.
Here I set up a new Service: Soil Sensor, with two standard characteristics, an Analog characteristic with two bytes and a Temperature characteristic.
The usr_read_soil_sensor function is then updated as follows to update the BLE Analog characteristic when the sensor is read over I$^2$C.
static void usr_read_soil_sensor() {
...
/* Update data */
sl_app_log("Cap: %d \n",capval);
sl_bt_gatt_server_send_characteristic_notification(
0xFF,
gattdb_analog,
2,
&capval,
NULL);
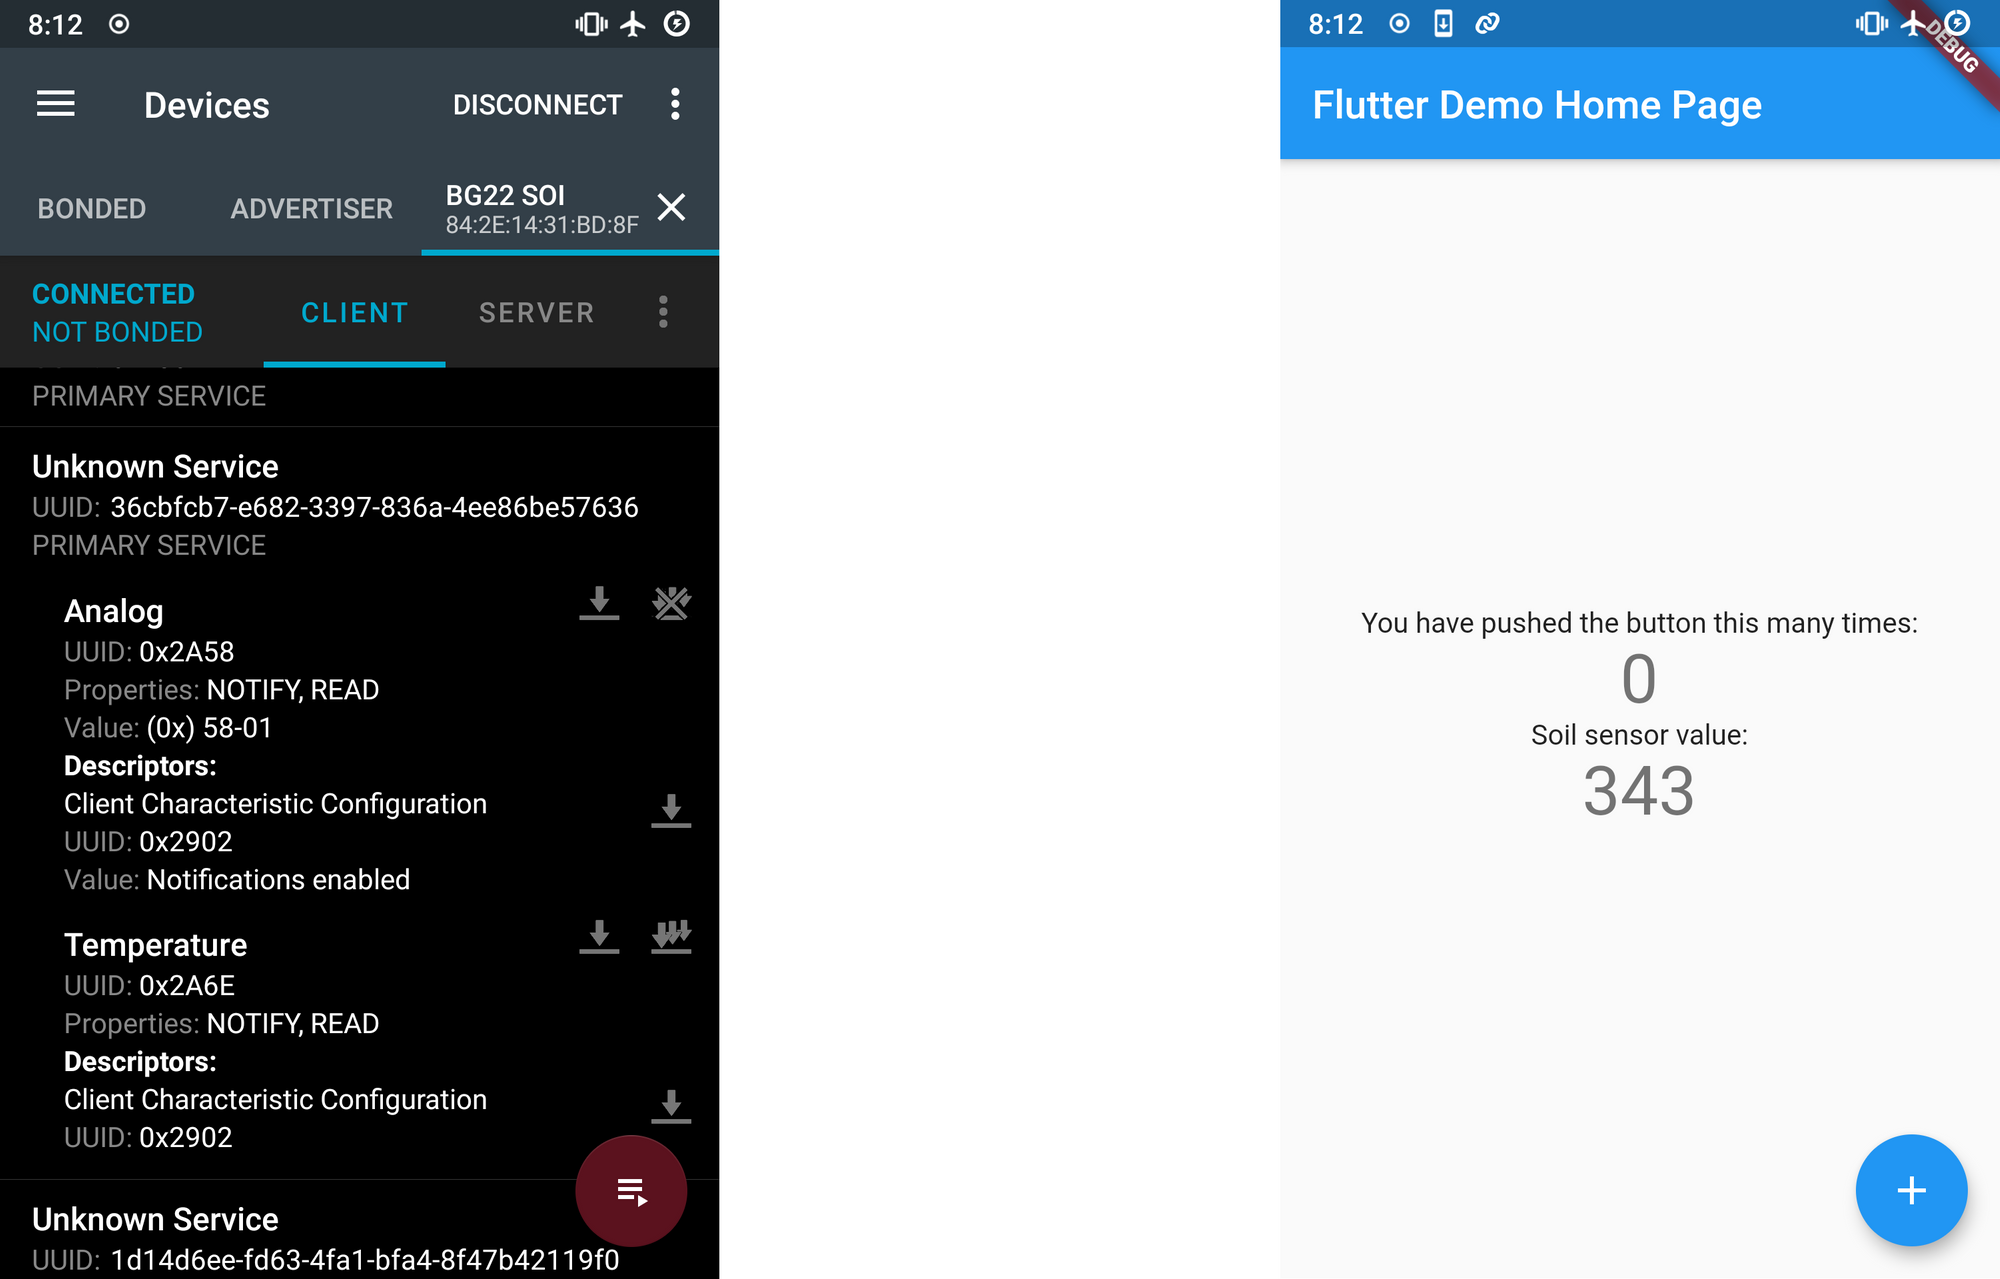
}Using the fantastic Nordic nRF Connect App, I connected to the BG22 board and made sure that I could read the output data. The data was in hex, big endian and it took two bytes. I made sure to take these factors into account when displaying the capacitive analog reading when I wrote a small Flutter demo app to connect to the unit.
Power
Using the Advanced Energy Monitor (AEM) hooked up to the Thunderboard, I also managed to measure the power consumption of my application. The way I wrote it wasn't designed to be power efficient, but I thought it would be interesting to know the power consumption either way.

On advertising, the unit draws about 6.92mA while when it is connected it draws about 6.86mA. Drawing on a study of CR2032 batteries, using 3$\sigma$ and a generous estimate of 50% of the battery life being available, that means that this system can operate on a CR2032 battery for approxmately 10 hours before it exhausts the battery completely.
If it were modified to scan and report to a server 15 seconds every hour, and it goes to sleep otherwise, the battery life can be extended to approximately 100 days.
This is quite a good result, without even resorting to careful power adjustments.
Conclusion
This was a great project to play around with the Silabs Bluetooth module on, and it has a practical result of having a soil sensor that I can read any time. Future work includes integrating it with a BLE gateway and having the data displayed on a graph.