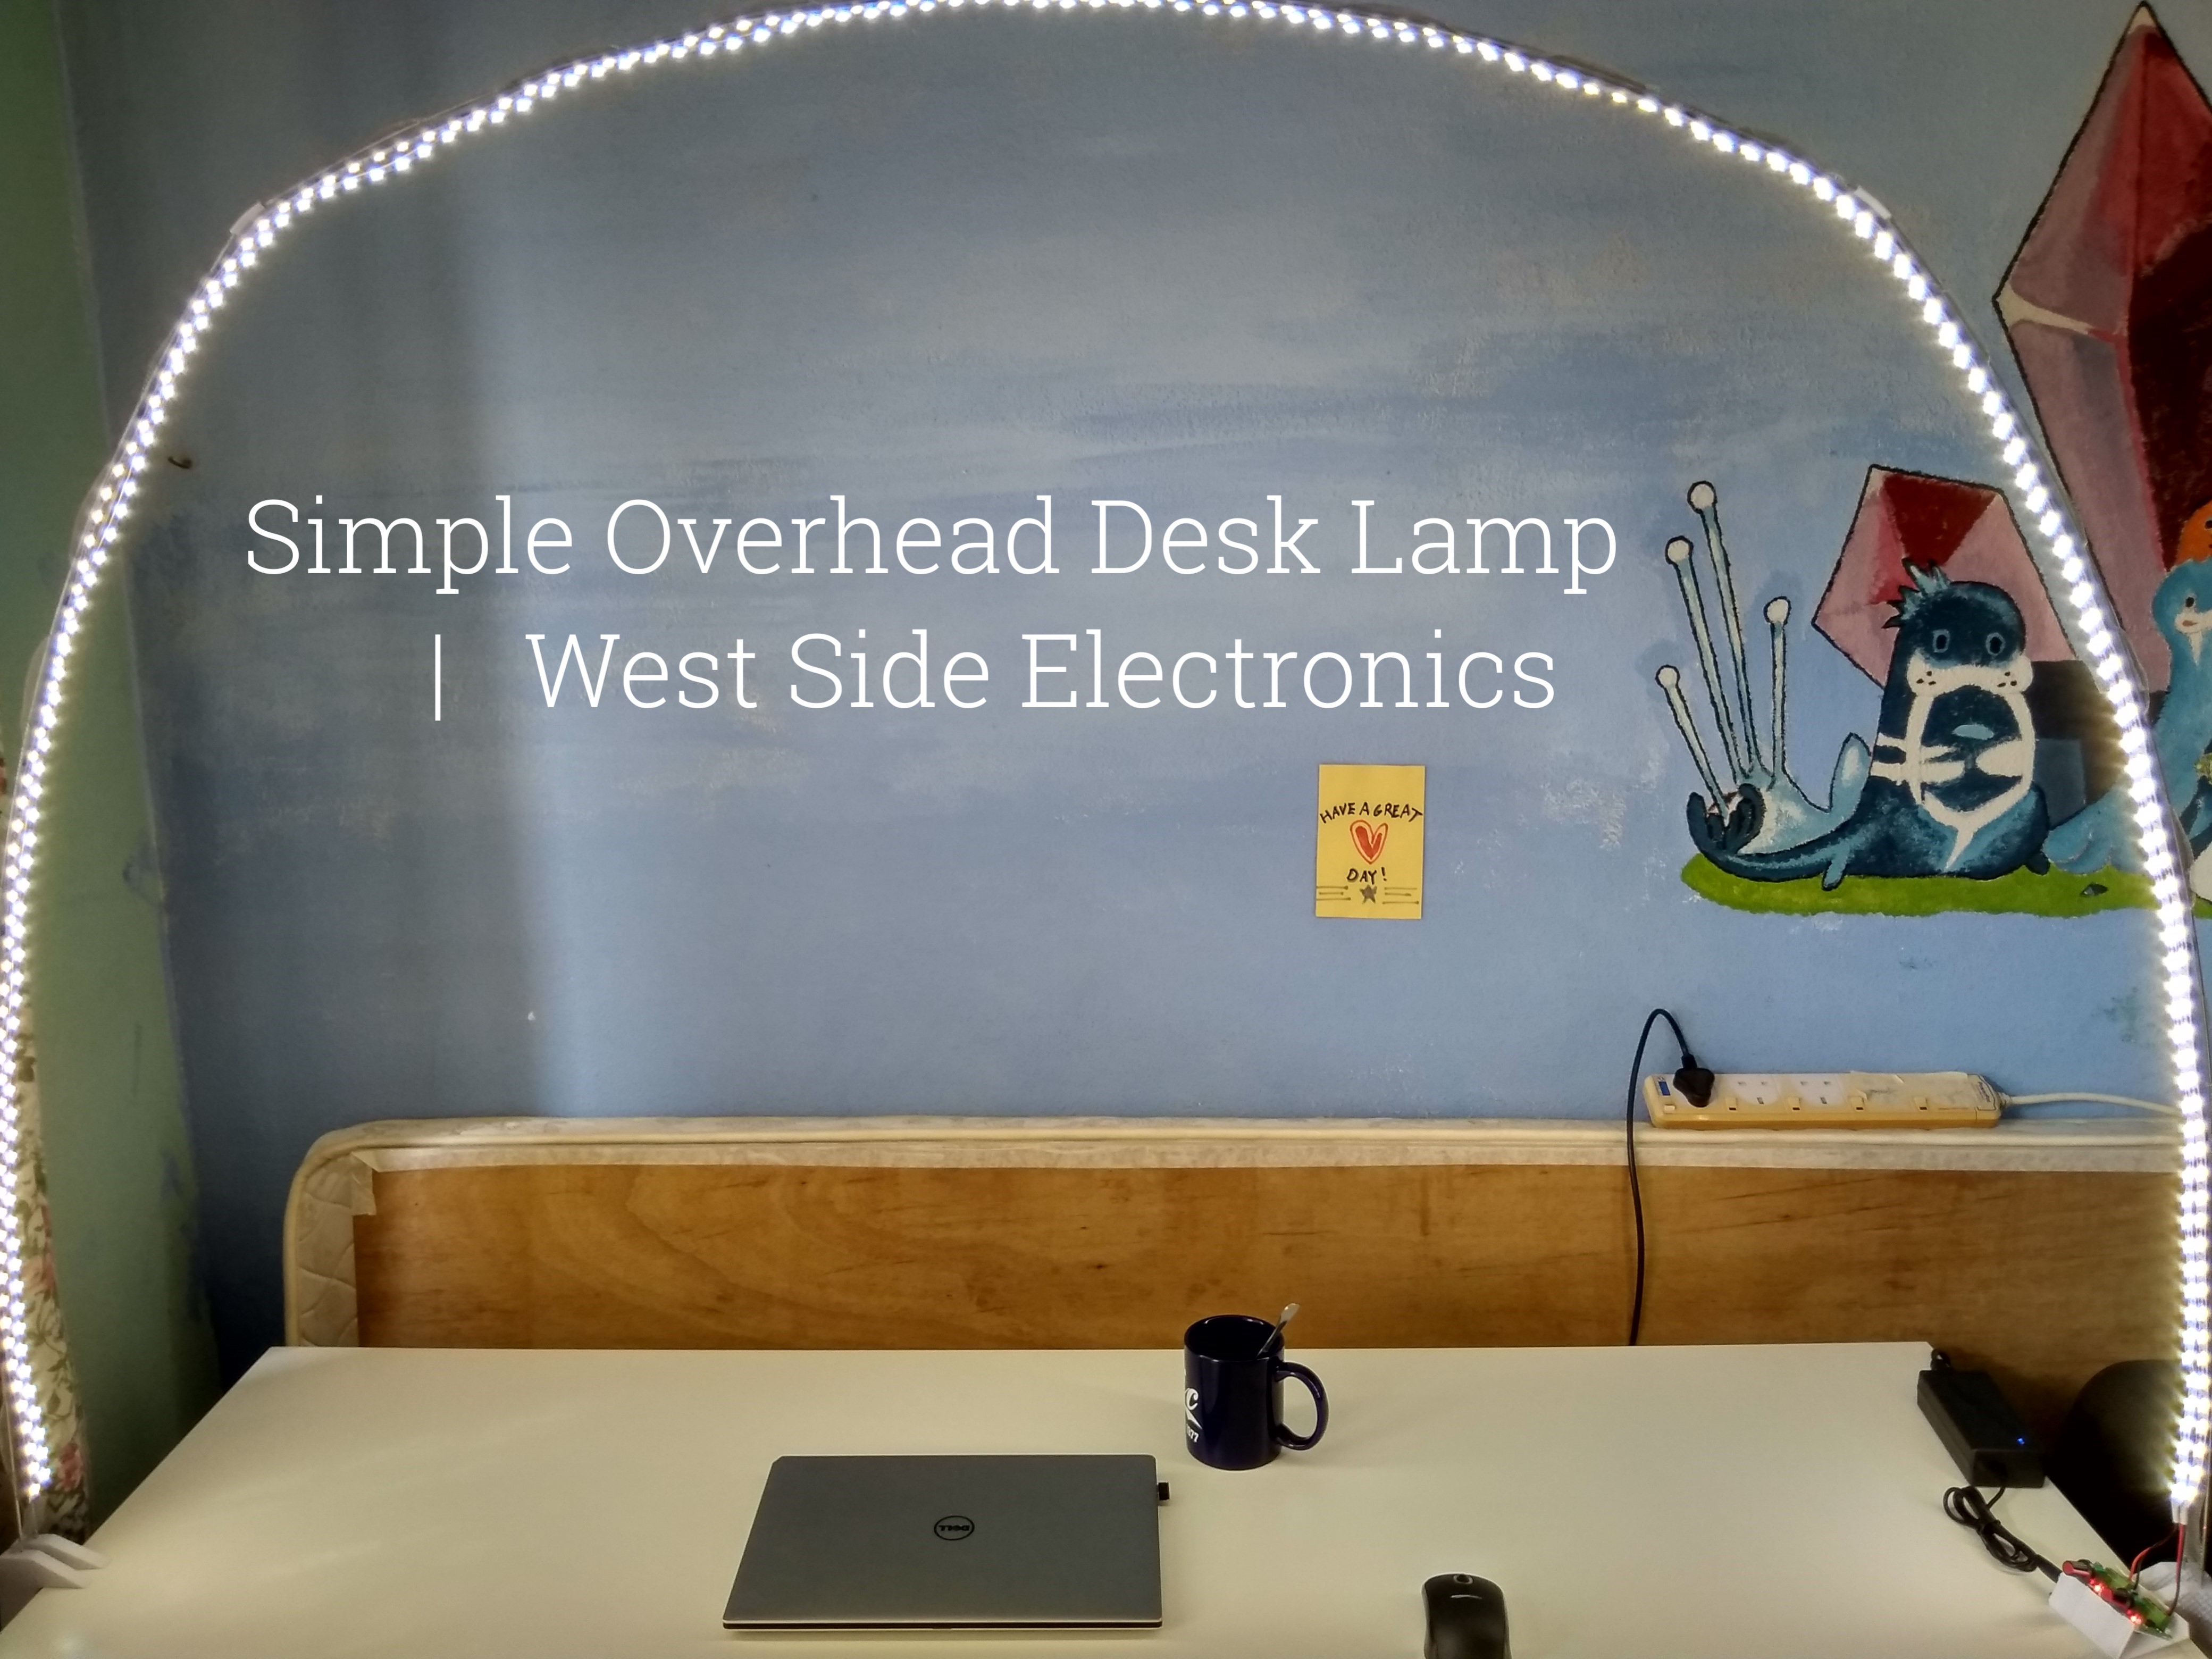
Simple Overhead LED Desk Lamp
Illuminate your entire desk with almost no shadows with this unique overhead arch design!


This is a easy project for adding some really nice lighting to your desk. It is an LED strip suspended in an arc above the desk, providing efficient lighting with almost no shadows. There is no soldering involved, so it is perfect for your first project if you've never worked with electronics before.
The original project is from DIY Perks, in which the overhead lamp was made with aluminium strips and the stands were made out of concrete. However the problem I had with the original design was that concrete takes a while to dry (about 2 days) and it took a few tries for me to get it right without it being either too sandy or crumbling apart.
Another problem that I faced is that the aluminium strip used to support the LEDs has to be thick enough to hold its own weight. DIY Perks does not mention how thick the aluminium should be, and the aluminium that I bought (1/16") was too thin, so it was generally unhelpful and floppy. I had to support it with some backing, which took some appeal away from the project.
Not having easy access to raw materials, I decided to modify this design a little. My project aims at a simpler method of implementing this excellent lighting scheme by using a slightly different support mechanism.
The base design of my project is also highly configurable: no aluminium around? Use wood. Don't want to 3D print? Use PVC tubing. Depending on the avaliability of the tools at your disposal, you can swap out alternatives as needed.
I try to provide both metric and imperial measurements, with metric being used for the base design and imperial measurements selected to the closest fractional inch for ease of design and assembly.
Design
Aluminium strips are quite hard to come by if you don't live in a country where raw sheet goods are easily available. Even then, they might be quite expensive. I bought two strips from McMaster Carr and was charged almost $30 for two inclusive of shipping.
The alternative is to use aluminium rods. Not only do they reduce the weight significantly, but they also offer excellent bending stiffness so you won't have a floppy strip.
I bought my aluminium rods at a craft store, and they are roughly 3mm (1/8") in width. My rods were 1m and cost $1.50 each. I recommend measuring the size of your table and getting about twice the length in rods. We are going to make two rails. For my design I used chicken wire to bridge the two rails, but this is completely unnecessary because the foam tape sticks perfectly well to the two rails.
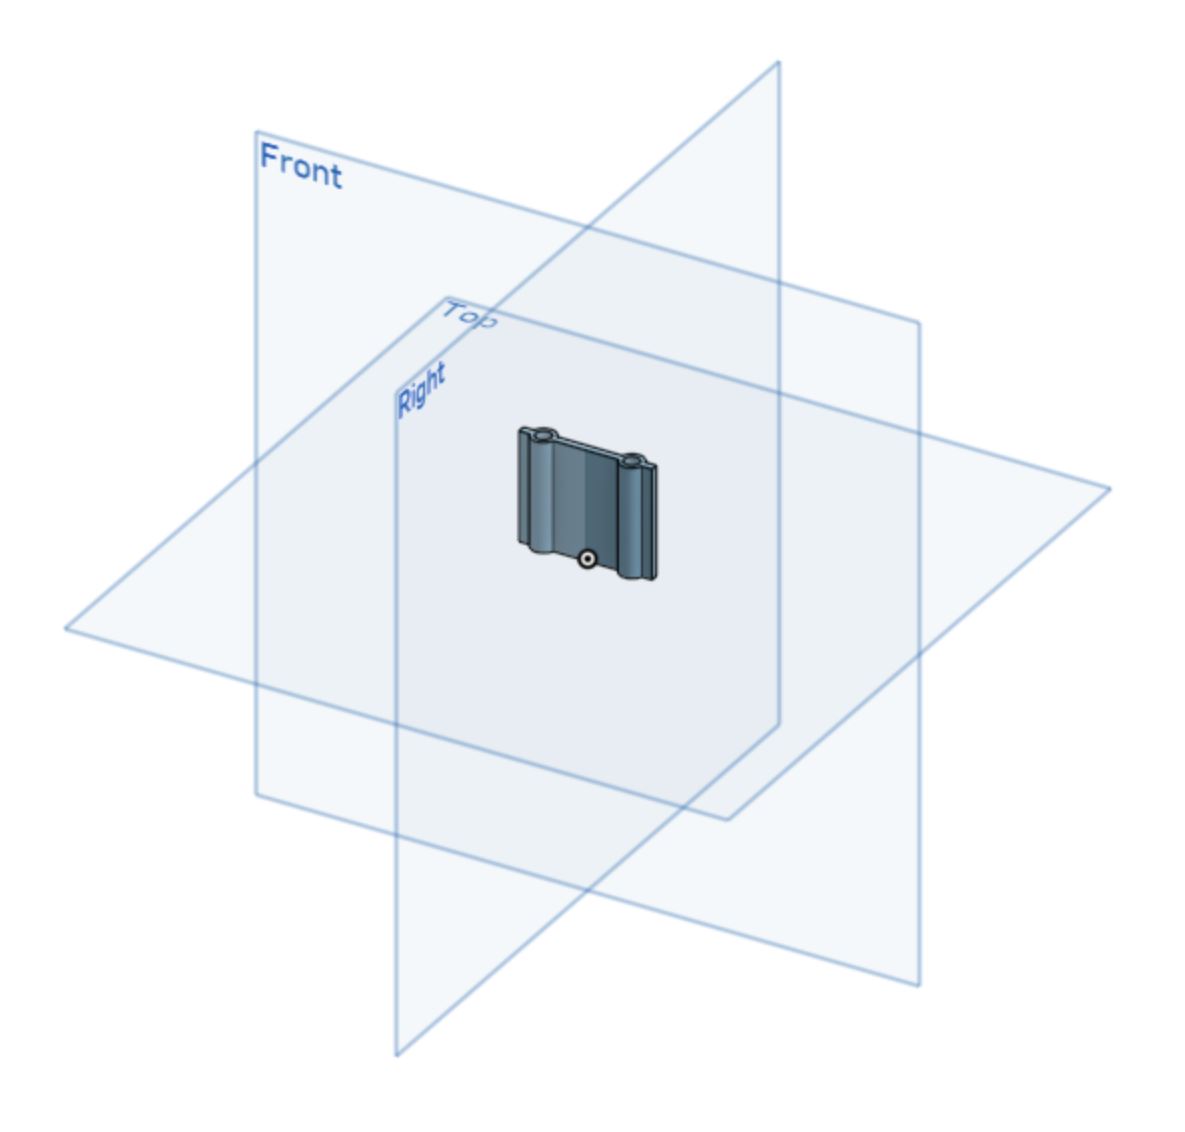
The rails are held together by 3D printed parts. For the sides I measured the thickness and took away 0.5mm so that it would be a friction fit. This was still a little loose, so I recommend taking away 1mm (3/64") for a better fit. Initially, I wanted to print each side as a solid piece, but when I realised that the middle section of each clamp would be wasted, I decided to print each clamp 'foot' separately. My clamps are about 1 cm (3/8") wide, and they have a 2.5cm (1") hole to insert the rods. The rods are spaced 2 cm (6/8") apart.

In order to join the rails, I printed connectors that had two holes. To prevent one rod pushing out the other, I accommodated 1.5cm (1/2") of each rod with a short, solid 0.5mm (1/32") space.
In order to attach the LED strips to the rails, I used foam tape, and it worked surprisingly well. I placed strips of tape about 10cm apart but you can definitely make it much closer for the LED strip to follow a nicer profile. I find that the sticky backing of the cheaper LED strips are not very reliable so the foam tape acts as a good substitute. If you would like to secure it further, you can 'clamp' the rods by taping the other side, trapping the rods between two strips of foam tape.
The resulting structure is very light and only requires the use of some 3D printing. If you don't have a 3D printer, you can also have the 3D printed parts made and shipped to you. As a rough estimate, each clamp took me about 30 minutes of printing, and the connectors took about 10 minutes.
No aluminium rod alternative
You can substitute the backing for balsa wood. This would impart a warmer feel to the design. Make sure the curve isn't too acute. You can also bend balsa wood by applying water and heat and this will allow it to retain its new shape without stress.
No 3D printing alternative
Alternatively you don't have to 3D print any parts. The clamps can be made out of wood, and the connectors can be replaced with PVC tubing, this type of connection works best if the curvature is small.
Electronics
I bought my LED strips from Aliexpress. I find that the quality has been sufficiently good for lighting, and I've used a setup of these strips for close to a year without noticing any difference in the color quality. They are also quite cheap, coming in at about $5 per roll of 5m with shipping. I have both warm white and white strips so that I can tune the warmness of the light. However, depending on your preferences, you might only want to go with one kind of LED strip, which will reduce your electronics costs by about half. Some color comparisons follow:
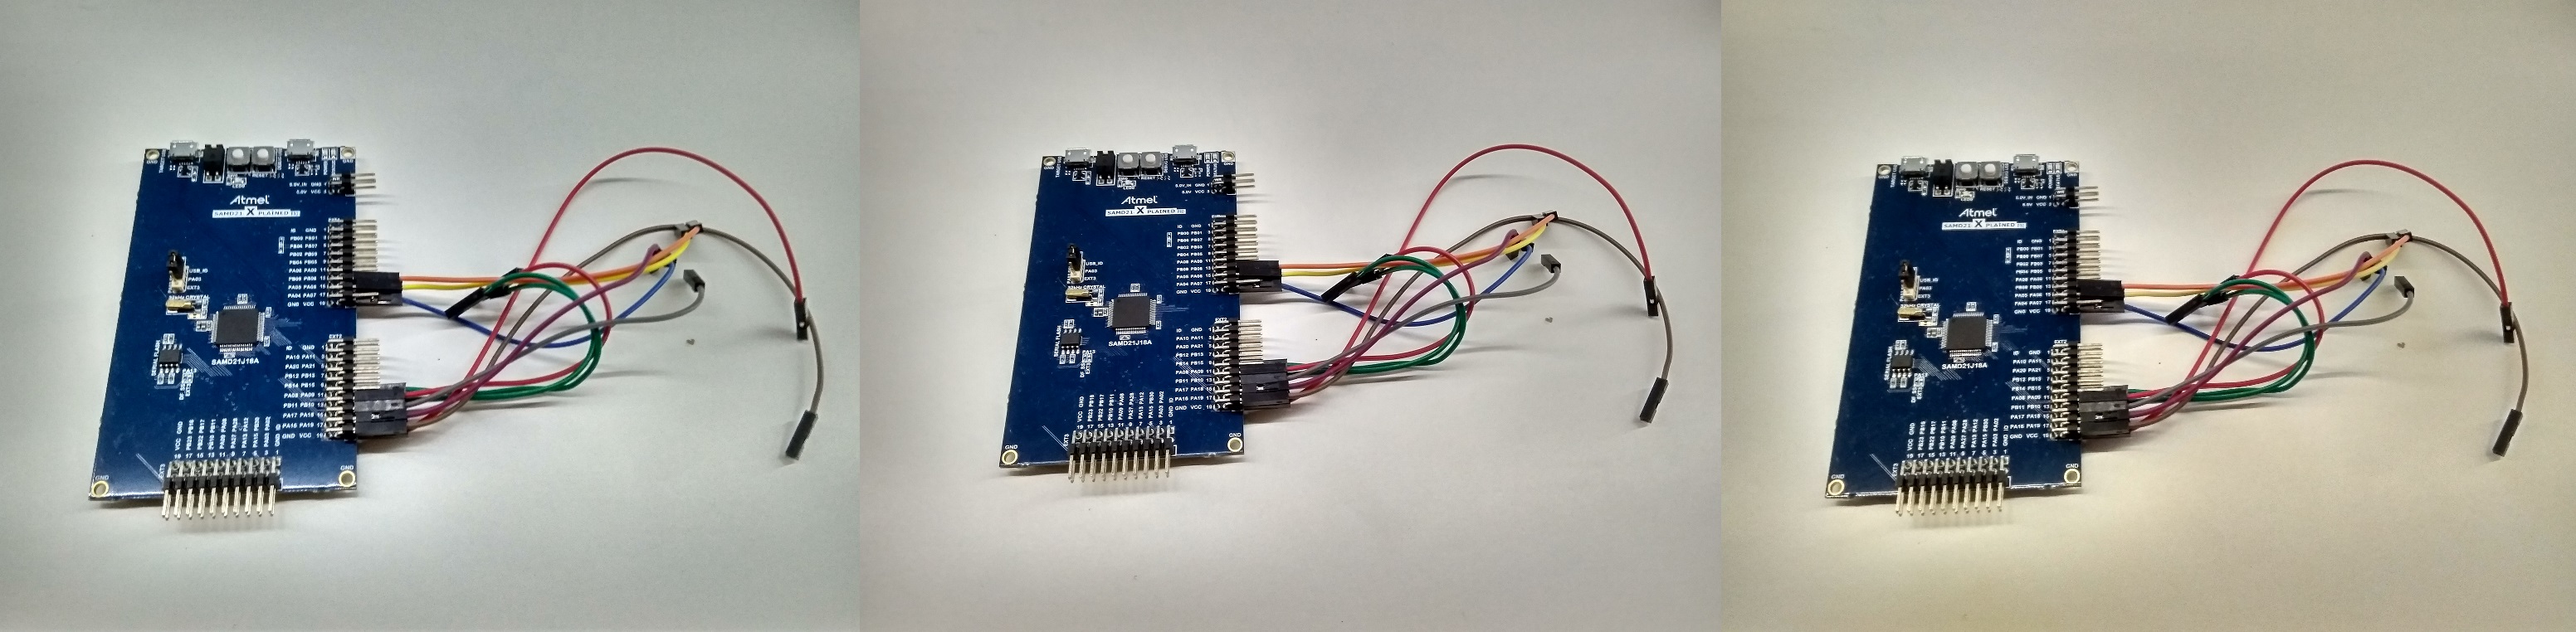
On the left is just white, the middle has a mix of warm white and white, and on the right is warm white (or yellow). The pictures are taken when the lights are at 1/3 brightness.
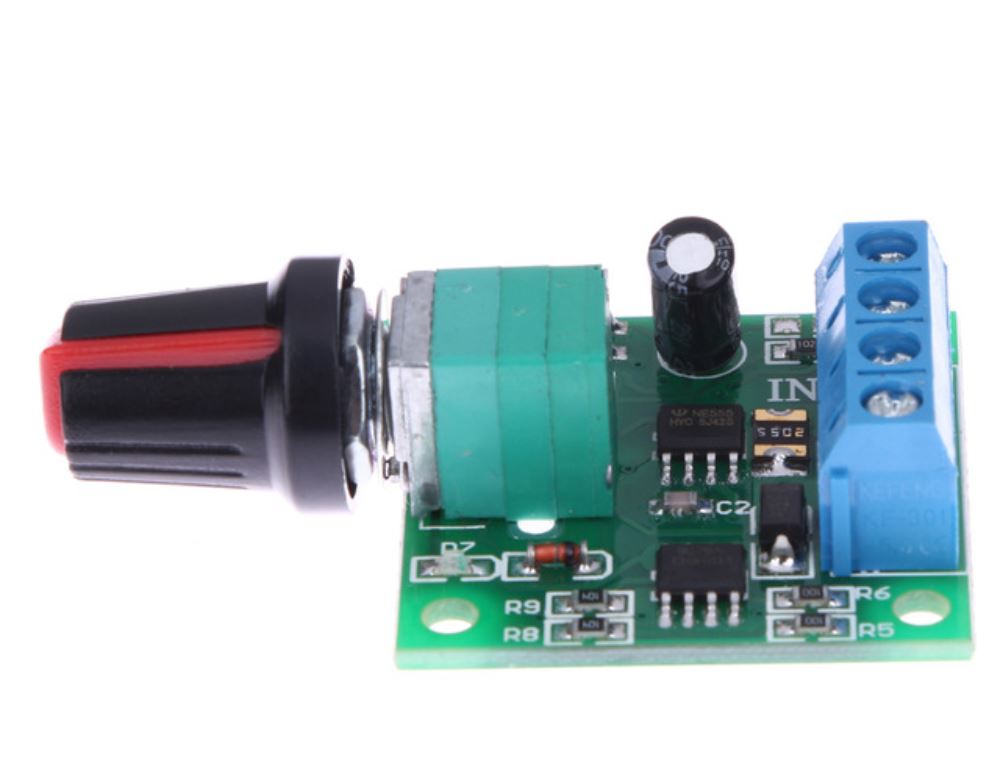
To control the LED strip, I also bought two DC motor speed regulators from Aliexpress that are rated for 12V, 2A operation ($4 total), and a 12V DC power supply that is rated for up to 5A ($8). I used a DC plug that I had lying around, and you can easily buy one for a few cents.
Just in case you were wondering about soldering, you can use a DC plug with screw terminals, so all connections can be made simply using screw terminals, without any sort of soldering. If you don't have wire, I recommend buying 24 gauge (solid core preferred) from Aliexpress, and you can strip the wires with a scissors in a pinch. However, in the interest of long term usability, soldering the wires would result in the most reliable setup.
With regards to shopping on Aliexpress, my advice is to pick the store with the highest number of positive ratings/products sold. I haven't had much trouble in that regard.
To mount the electronics, I used a 3D printed base. My enclosure didn't work that well, so is still a work in progress. You can also buy a project case and drill a few holes to enclose the electronics. Connect the power of the LED strip to Motor + on the controller and ground to Motor -. Finally, connect power from the power block to the controller. Make sure to check which connection is power and which is ground for the DC plug that you bought.
Turn on the power and you will have made for yourself a custom minimalist overhead desk lamp! By virtue of the arc nature, the shadows are very minimal, and the thin nature of the design really reduces the visual clutter on the desk and in the room.
By having two different colors, I can tune how yellow the light is. This really comes into handy when I am working on a project and need to see the detail vs when I am getting ready for bed. This light is bright enough to illuminate the rest of the room, so you don't really need to turn on your room light as well.
This type of lighting is really good for studying, reading, detailed work, or taking pictures, and is especially useful if your desk is positioned where there is a lot of shadow from lighting or not much natural light.