Fairy Light Teardown
Tearing apart a solar powered fairy light unit to see what makes it blink and shimmer.


It is a fairly interesting to me that you can get a cheap (~\$6) solar powered device that controls a bunch of long fairy lights. Think about it: a battery, a solar panel, a string of LEDs, and a PCB to control it all, housed in a water resistant case for \$6. That's a lot of things for \$6.
These devices require a low voltage source for power, and are often deployed in open spaces where power outlets are not easily accessible, which makes them perfect candidates for solar power. This is actually quite close to the use-case of wireless devices, where in order for them to be useful, they should be as independent as much as possible so that they aren't tethered to an outlet, especially so for wireless sensor nodes.
Devices such as motion-sensing lights, patio lights, or even garden lights fall into this category.
One device that I chanced upon was the solar powered fairy light, meant for small outdoor installations, so I decided to take it apart to see how these devices are made to be so affordable.
Mechanical
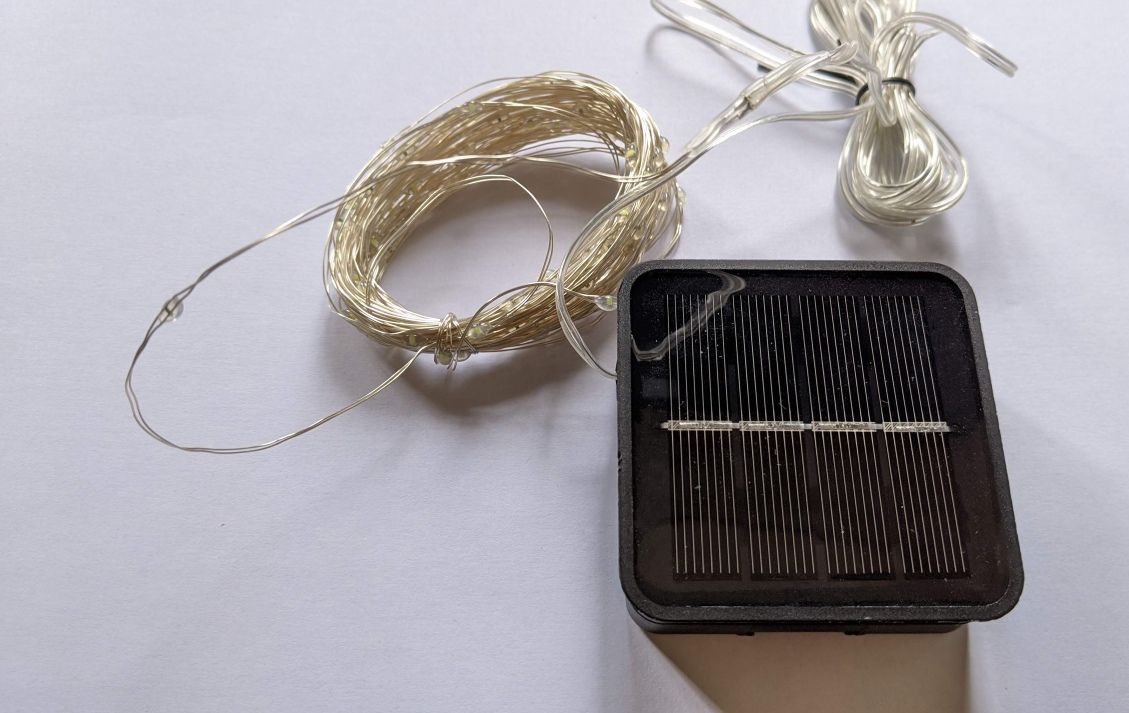
The front of the fairy lights are some PV cells that appear to have been assembled in place instead of being from another panel. It is fairly well done, with no gaps that I could see.
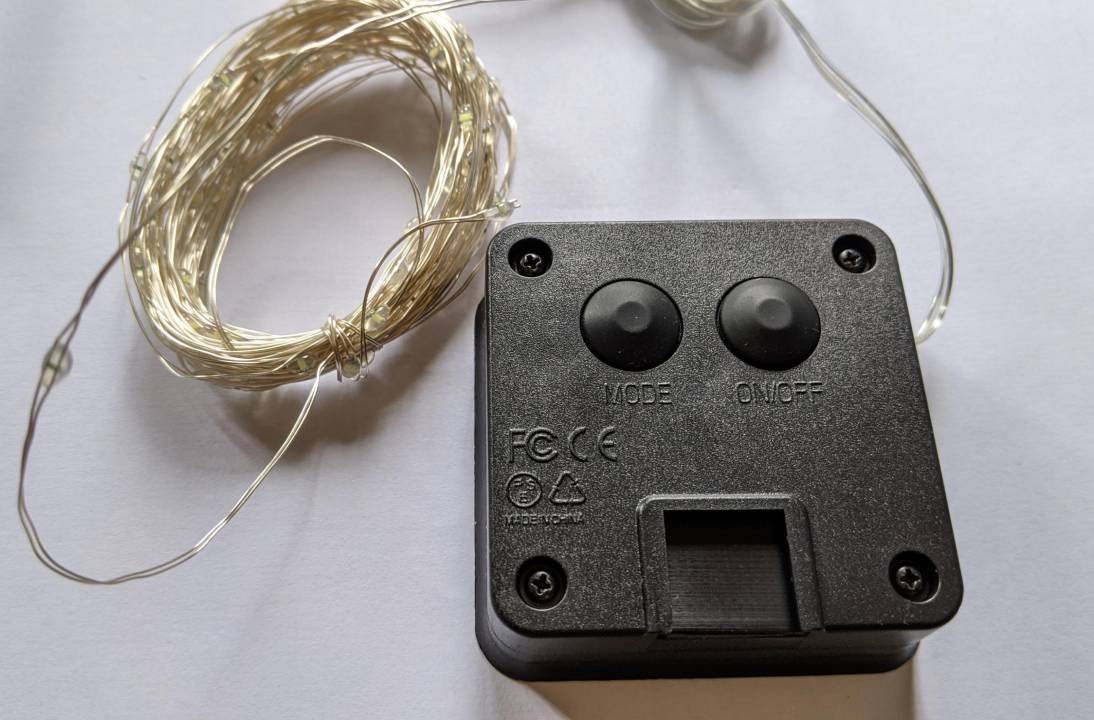
The back of the fairy lights boast a few certifications that I find a little unnecessary, given the cost of the product and the fact that it doesn't have any RF parts to speak of. But still, good on them to get those certifications.
The overall construction is quite sturdy and it feels solid. A single Philips head screwdriver is required to disassemble the unit.
Water ingress
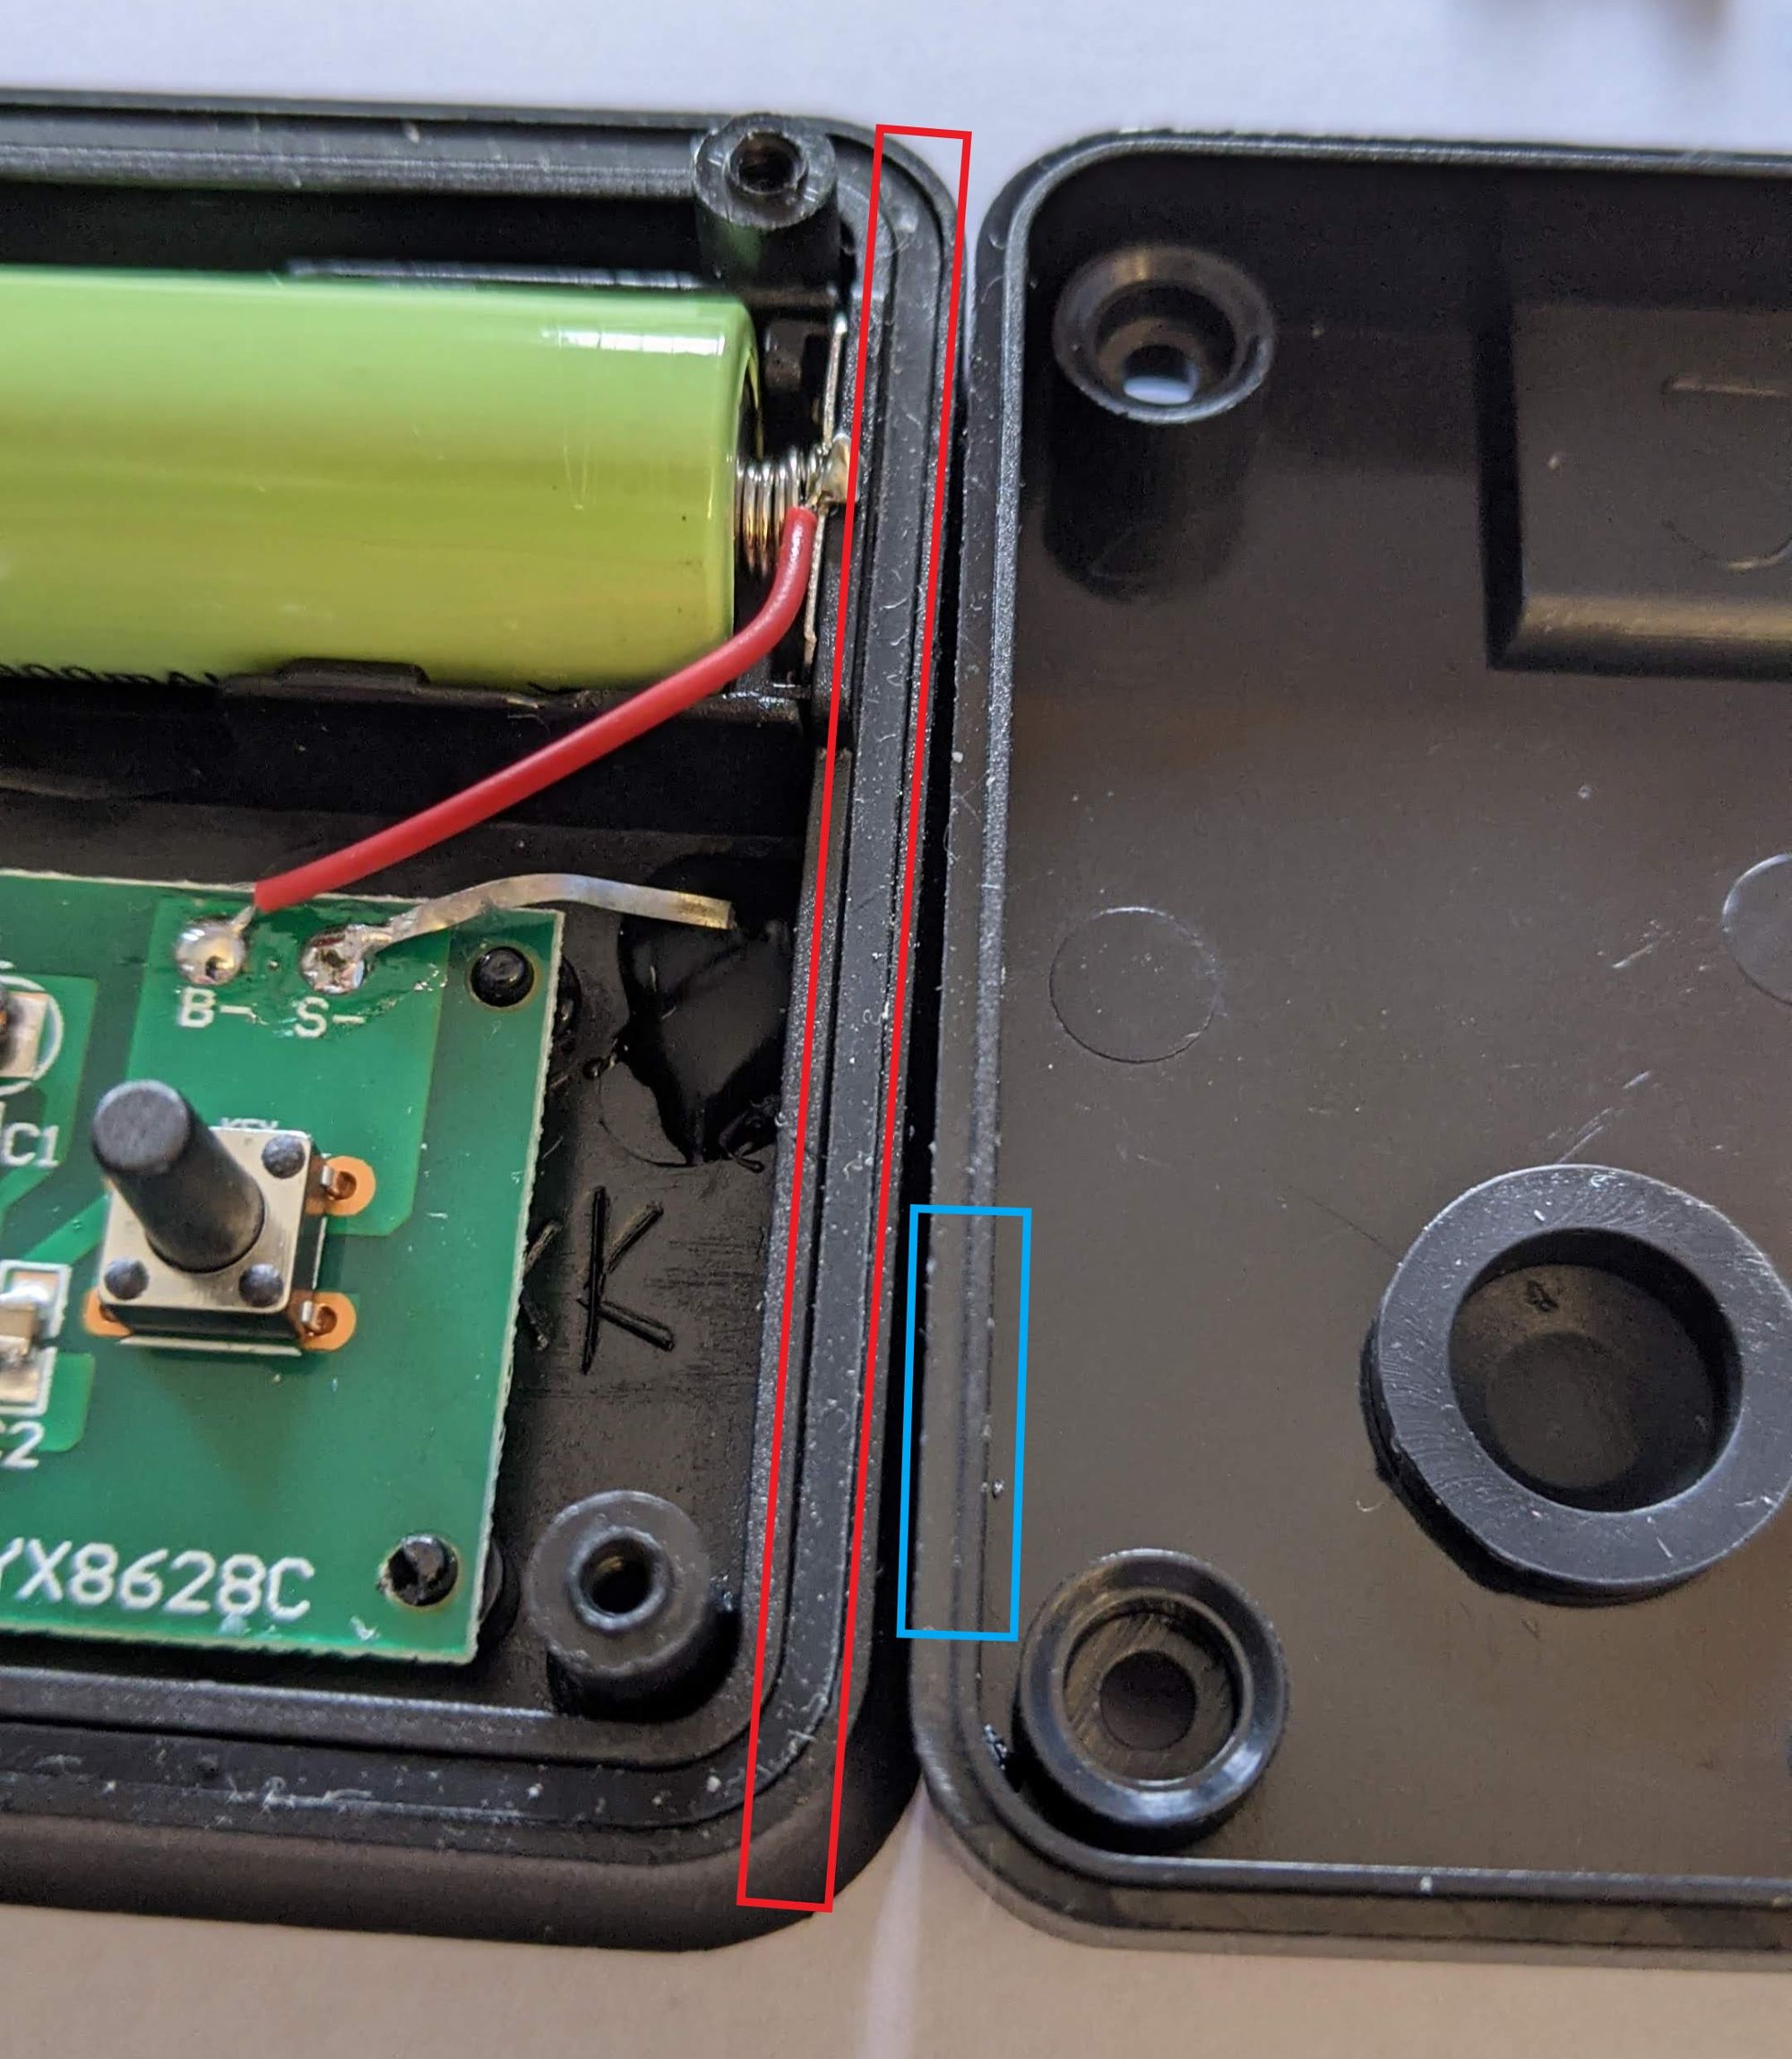
The most interesting thing for me was how it was designed to prevent water ingress. There is a channel designed for a rubber gasket (red), and a corresponding lip (blue) that presses down on this gasket to seal it against the elements.
There is a post for a screw, and there is a capture post on the corresponding piece to assist in alignment. The idea is that the capture post holds the post in the desired position for the self-threading screw to be inserted, rather than using the screw to align the post by 'searching' for it. This results in a faster, more accurate assembly process.
The silicone buttons that sit on top of the SMD switches have a lip to keep them in place and to keep water out.

A rubber seal with channels for the fairy lights allows the wires out of the enclosure. There is a corresponding half-seal on the other piece of the enclosure to clamp the wires securely.
Electronics
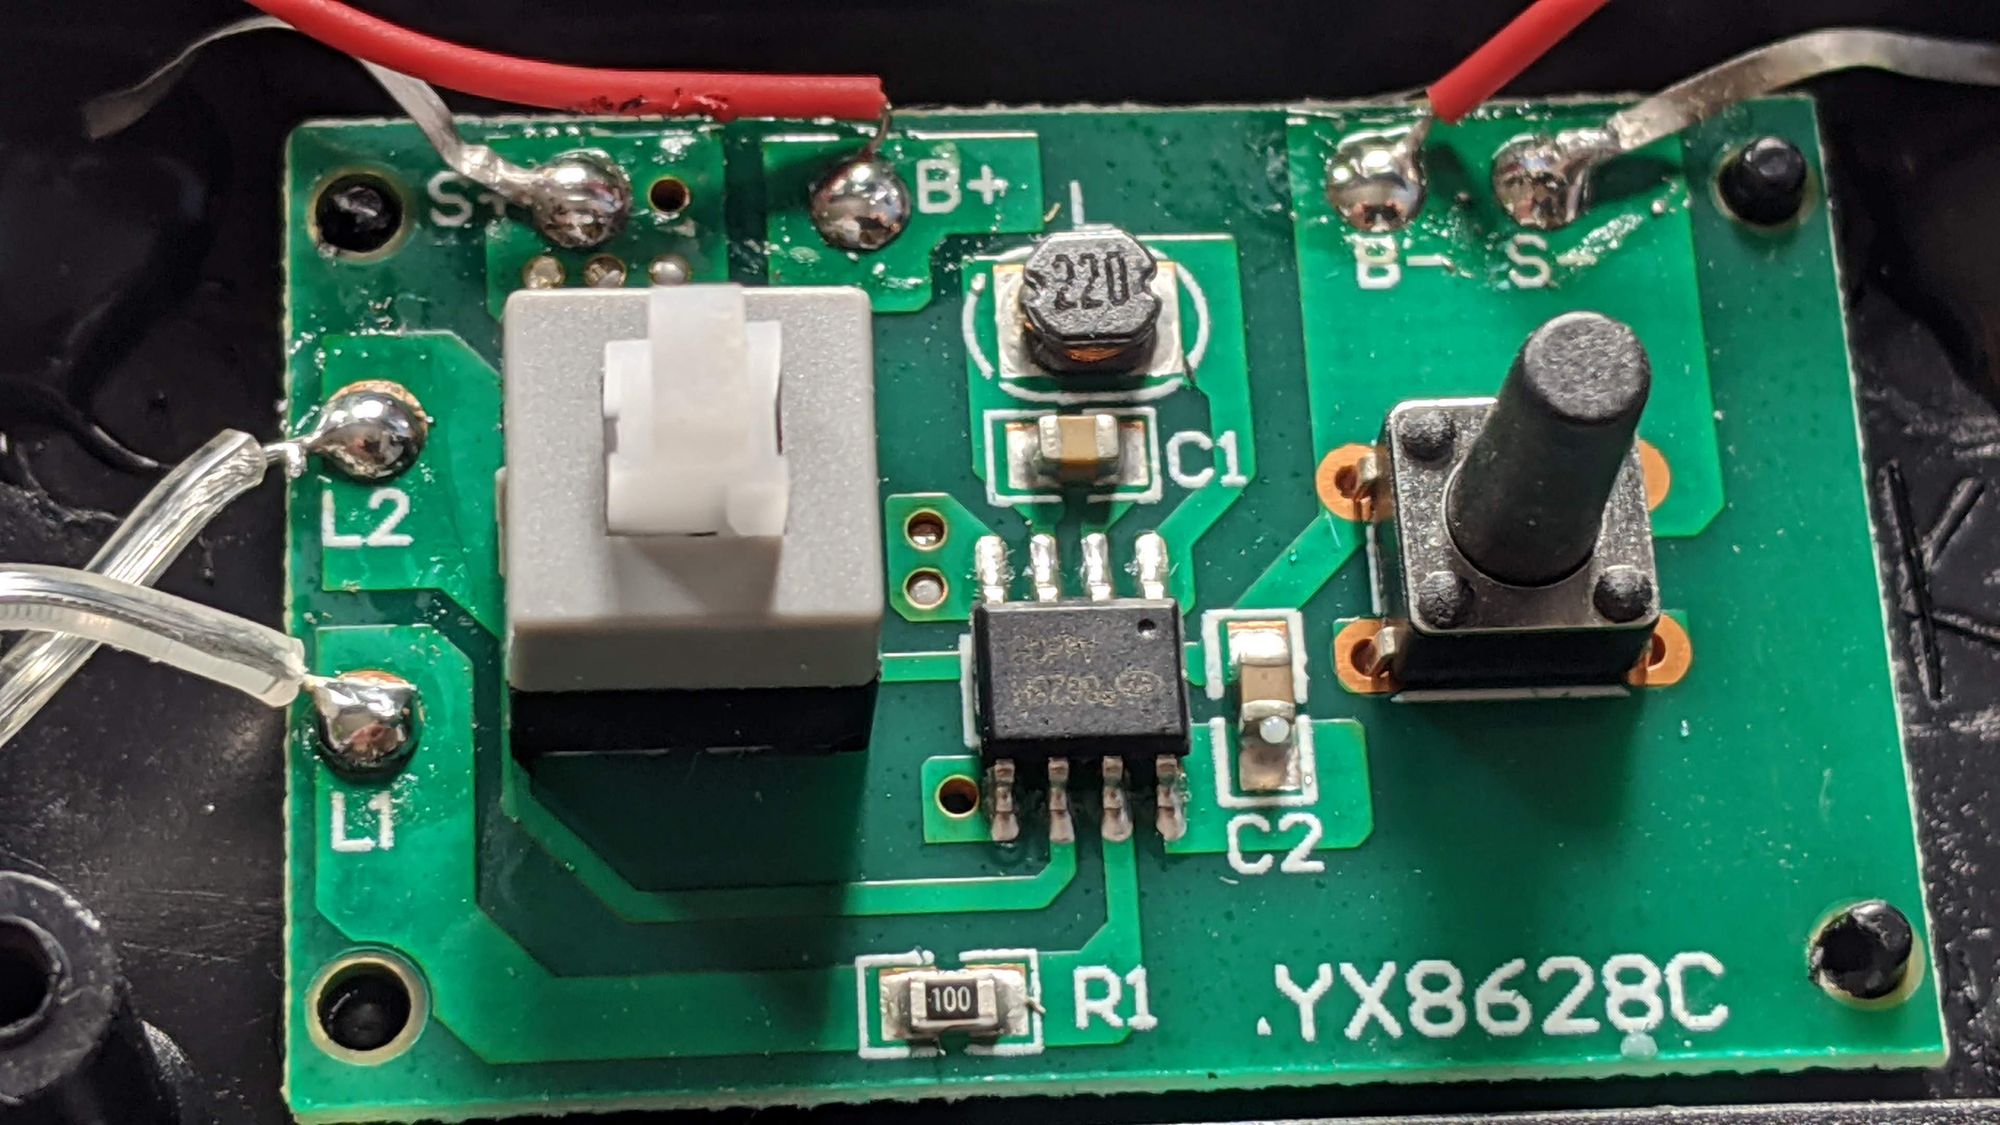
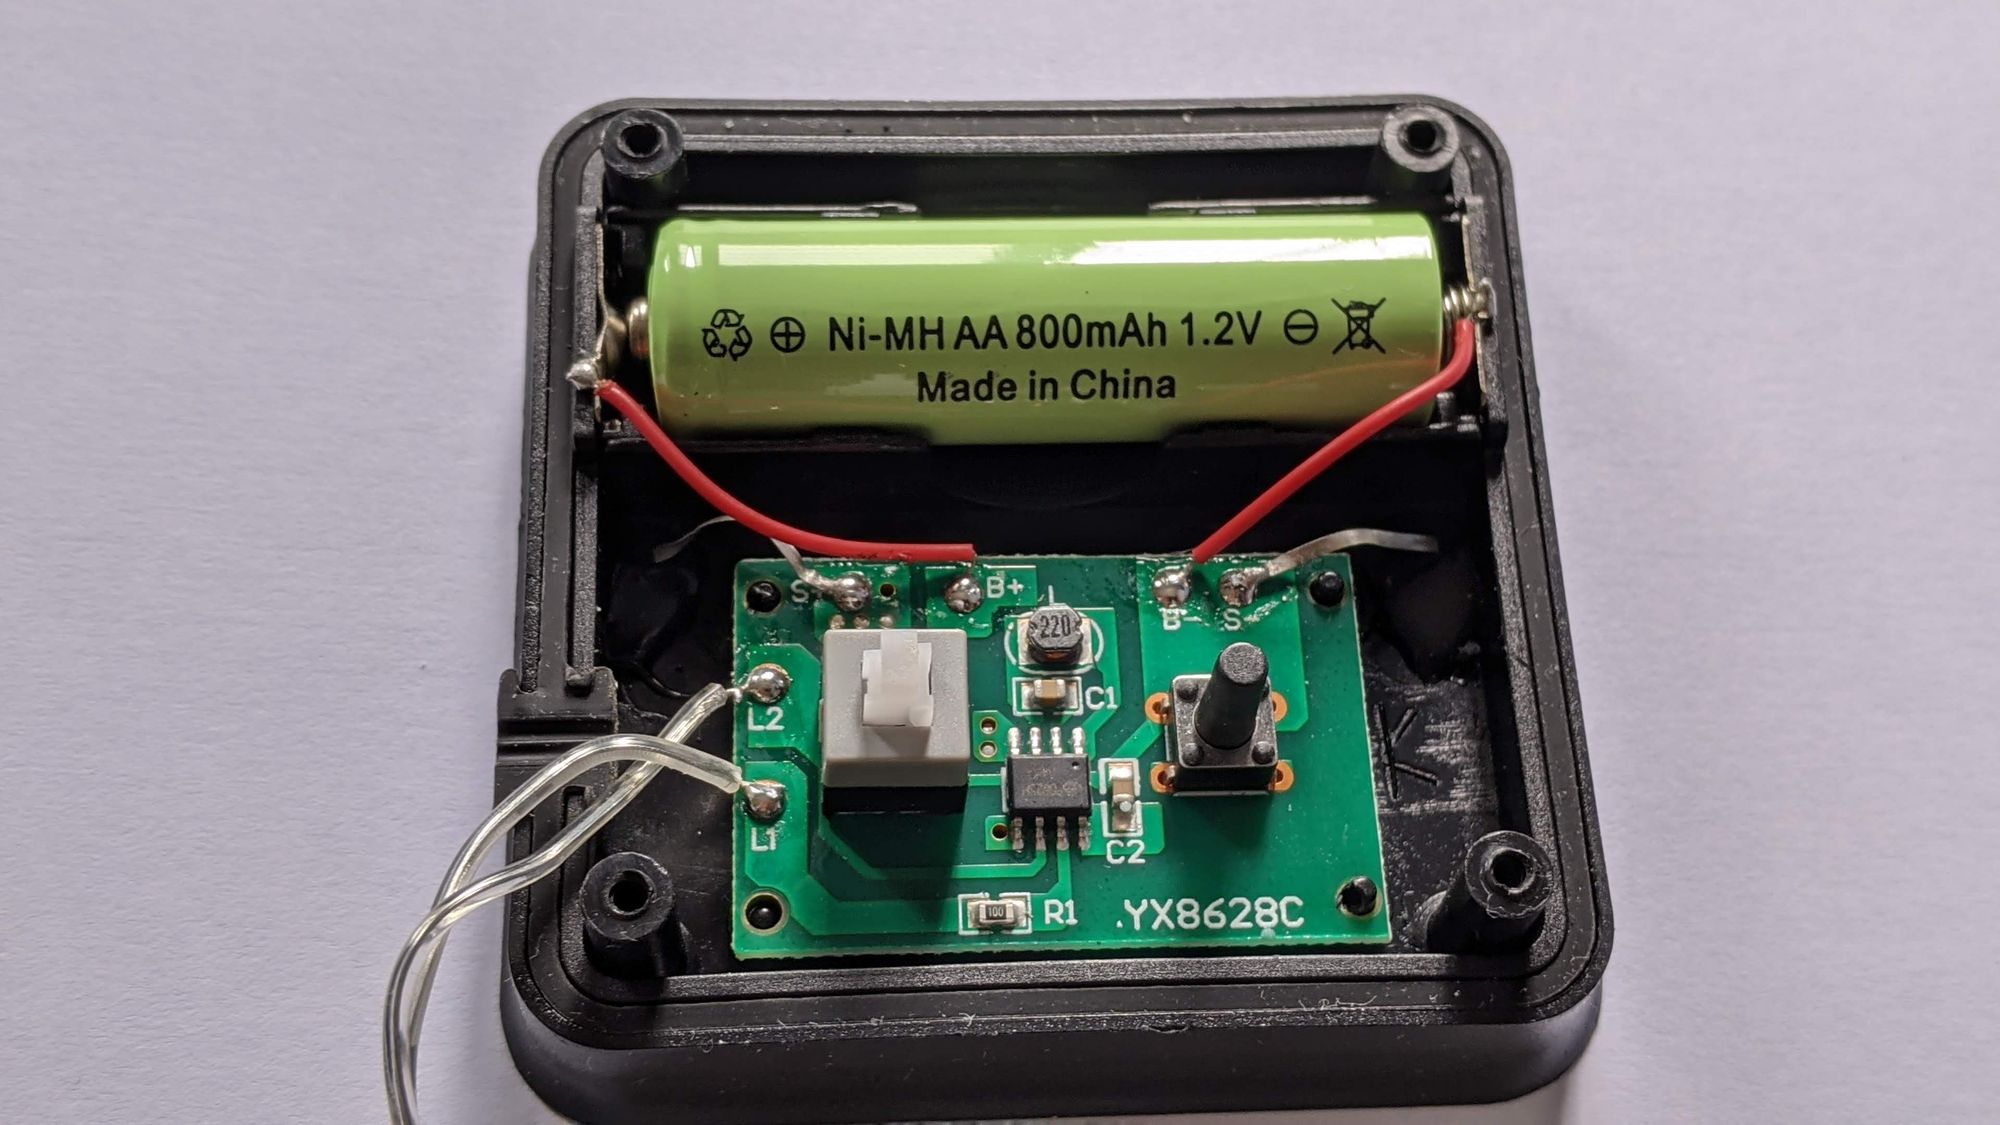
The PCB is very nicely and clearly labelled. It is secured by four posts that are melted to hold it in place. It is also clearly labeled with the IC's number. It happens to be an IC that is specifically designed for this purpose. From the manufacturer's website YX8628C is 太阳能LED灯串升压八功能驱动 roughly translates to: Solar LED fairy lights with eight functions.
In fact this IC comes from Shiningic, which also produces the YX8018 IC that has been the feature of a few other teardowns and hacks.
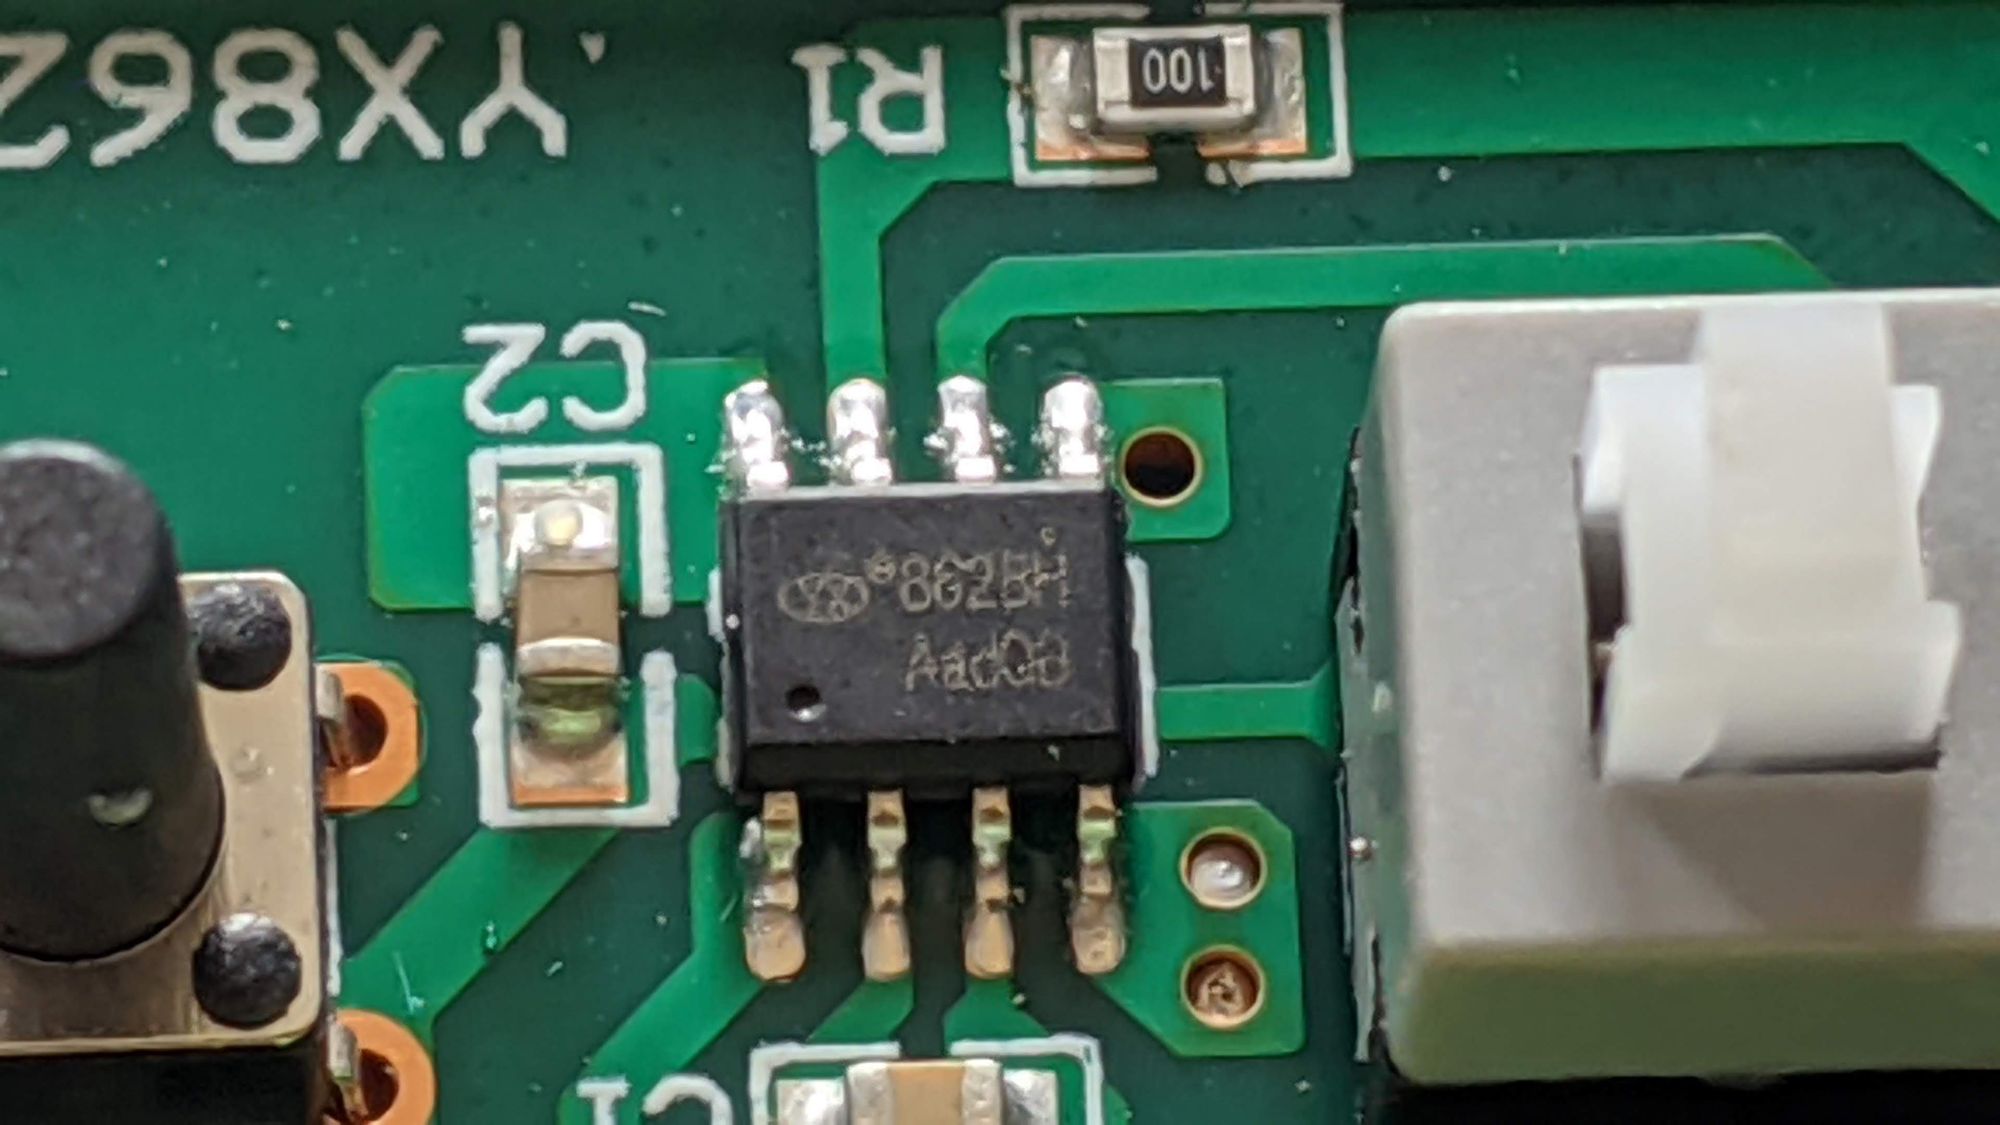
While the board reads YX8628C, the IC doesn't read the same value, replacing the C with H. However, with regards to the circuitry, I found it identical to the circuitry from the datasheet provided by a supplier, and there were even a few resellers selling the H version of this IC:

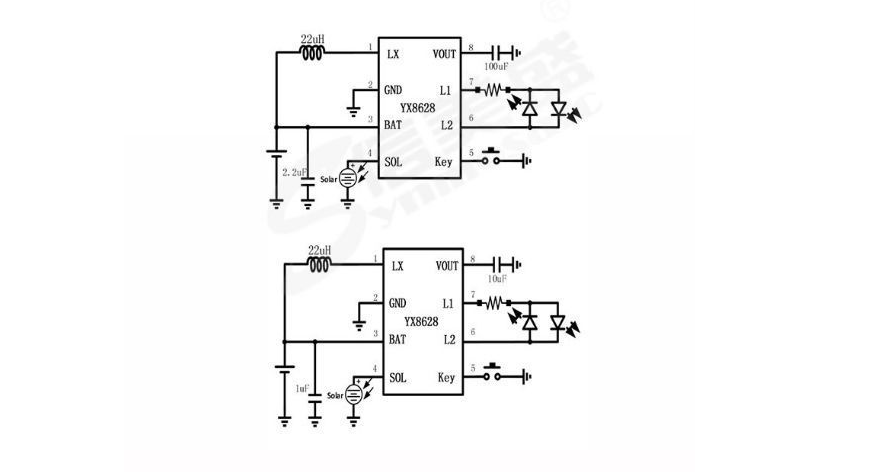
The interesting aspect of this circuit is the pin labelled V$_{\text{out}}$. It is not connected to anything at all on the circuit, but my probe indicated that it was outputting a rather respectable 3.26V. One could conceivably desolder L1 and L2 and then connect a separate circuit to V$_{\text{out}}$ and GND to obtain a 3.3V solar powered supply.
After further exploration I discovered that the voltage is only 3.3V when the solar panel is not charging. When there is a significant voltage from the solar panel, the voltage drops to 1.34V.
Looking at the connections L1 and L2, the fairy lights are able to have some semblance of animation because of the alternating voltages on these lines, so two sets of LEDs can blink alternatively. Relative to ground, I was able to measure -1.32V on L1, which means that the IC also has circuitry to generate negative voltages.
Next steps
I was not able to find a reliable source to obtain this IC. Apart from a few merchants on alibaba, it doesn't seem like anyone else is carrying the IC.
Update [27 Nov]: I was able to get the IC through LCSC. These are the same guys who managed to get the debugger and emulator for the 3 cent microcontroller board.
However, it does seem to be a rather promising device for solar powered projects because of the low component count and the automatically sourced output voltage at a modern IC friendly level of 3.3V.
In fact, it comes in such a convenient package: battery, solar, power circuitry, that it is quite tempting to skip the step of making your own enclosure and circuitry and hack the one that comes with the fairy light instead.